Train & Deploy Your GPT With Custom Data
Today's tutorial will guide you through creating a fine-tuned GPT chatbot. We'll show you how to train it on custom data from multiple sources, such as PDF files, Azure storage, PowerPoint presentations, and even custom cloud databases. Once you've fine-tuned your chatbot, we'll walk you through the straightforward process of publishing the AI agent into a beautiful chatbot widget. This widget can be easily deployed to your website or integrated via API to a third-party system, ensuring a smooth and hassle-free setup for your chatbot.
One of the standout features of BotX's AI agent designer is its hypergraph engine. This powerful tool allows you to connect not just a single folder or system but numerous different systems and file formats. This flexibility is a key advantage when working with multiple data sources for your fine-tuned GPT chatbot.
The full video tutorial is also available on YouTube.
Without further due, let's get started.
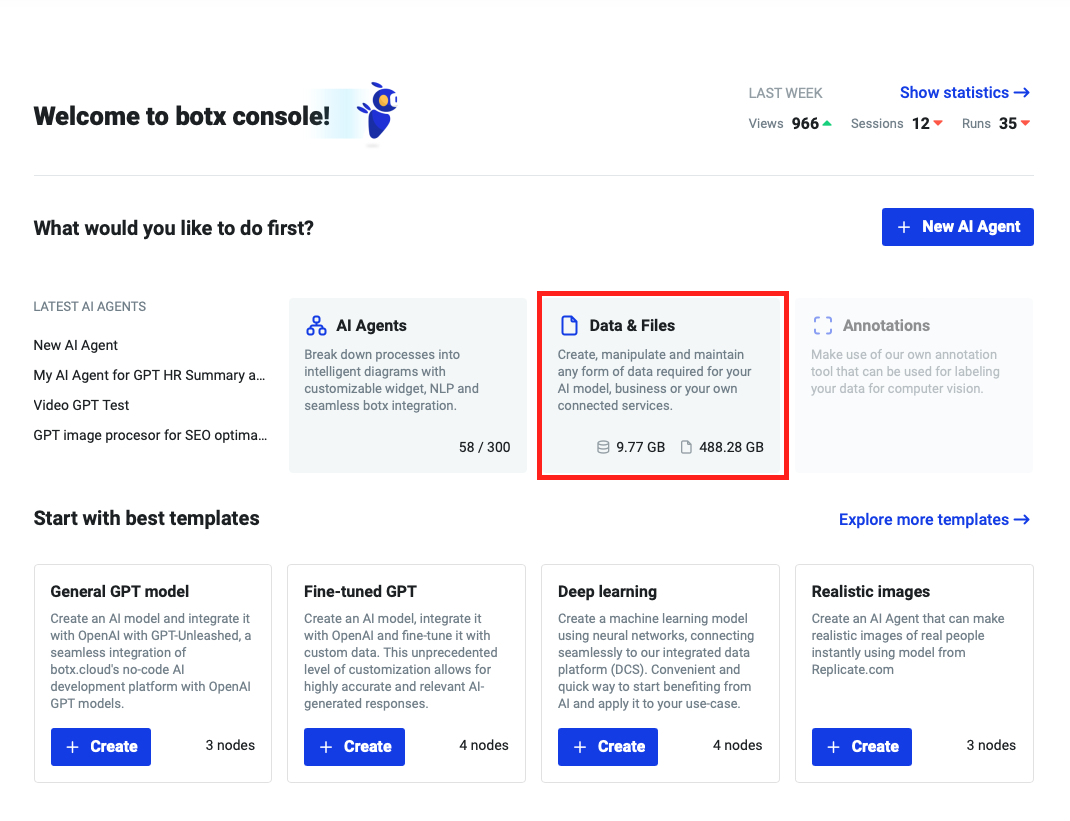
Step 1: Start from the Dashboard
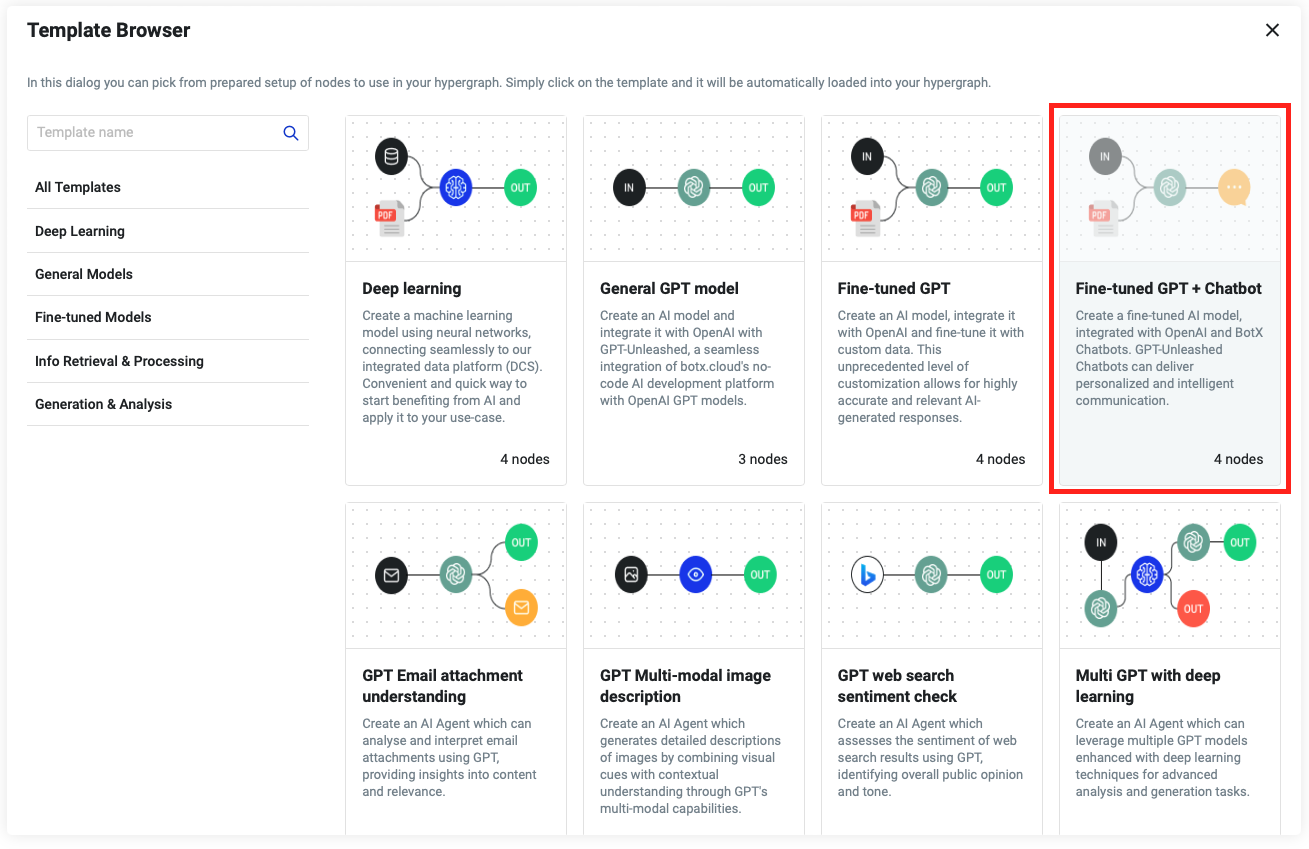
Click the "Explore more templates" link, and from the list of available templates, choose the "Fine-tuned GPT + Chatbot". Alternatively, create a new empty AI agent, and from the designer's welcome dialog, click "Select Template" -> and choose the same "Fine-tuned GPT + Chatbot" template.
This action will create the essential components for your AI agent. As you can see, it is made using OpenAI's GPT AI model and trained with custom data in your BotX cloud database.
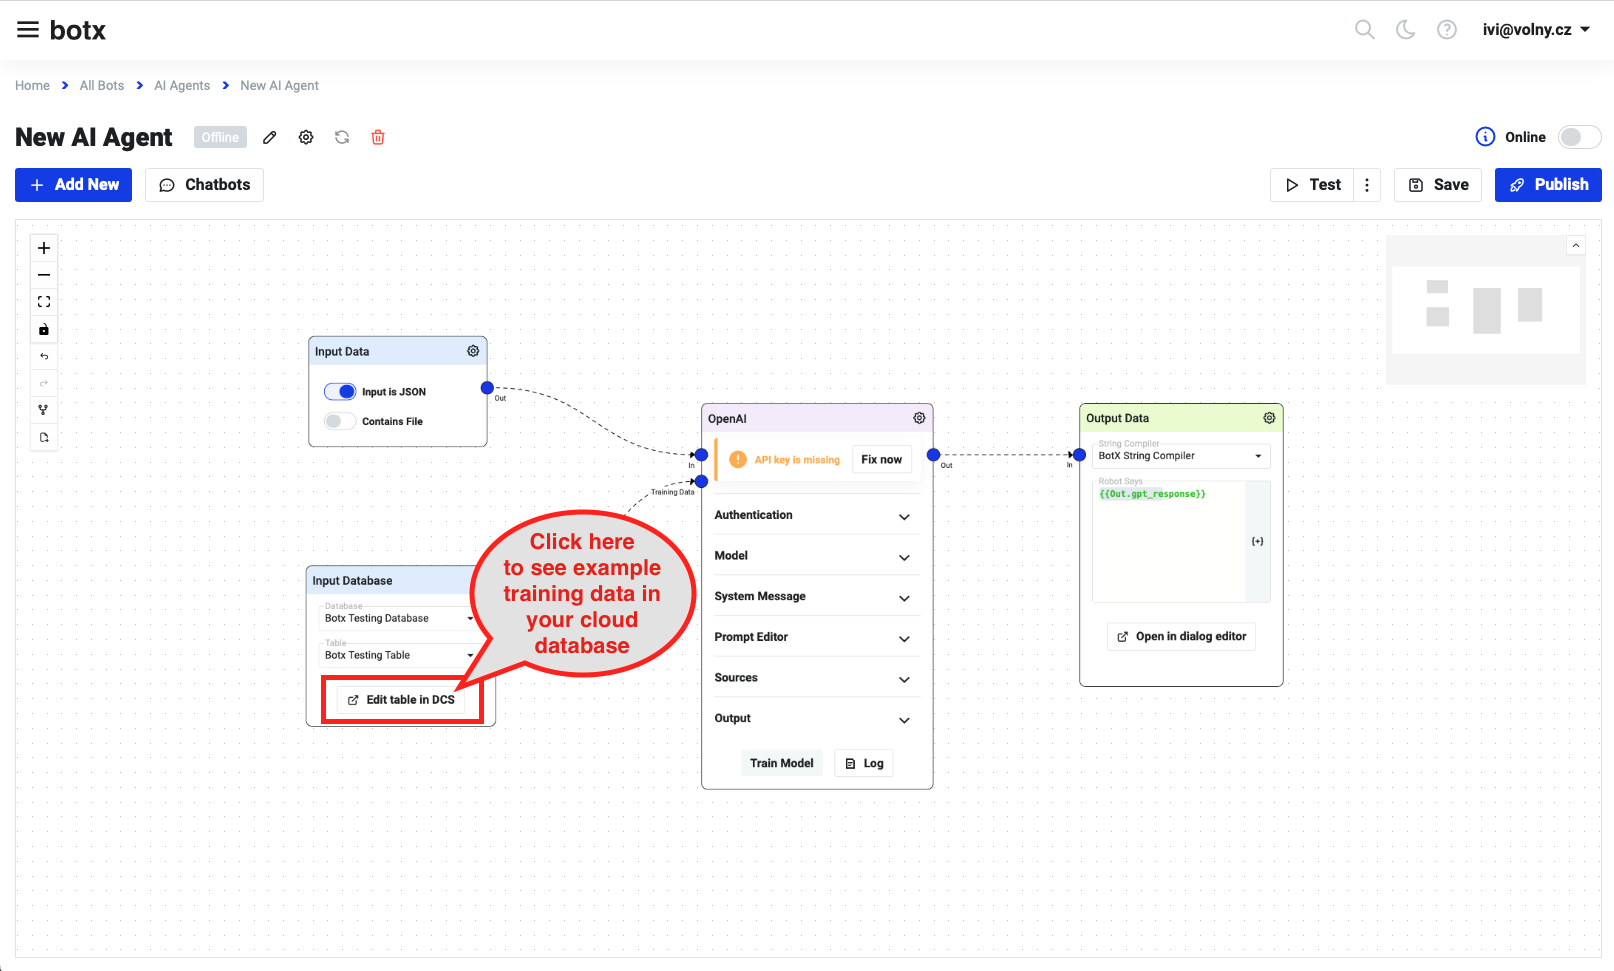
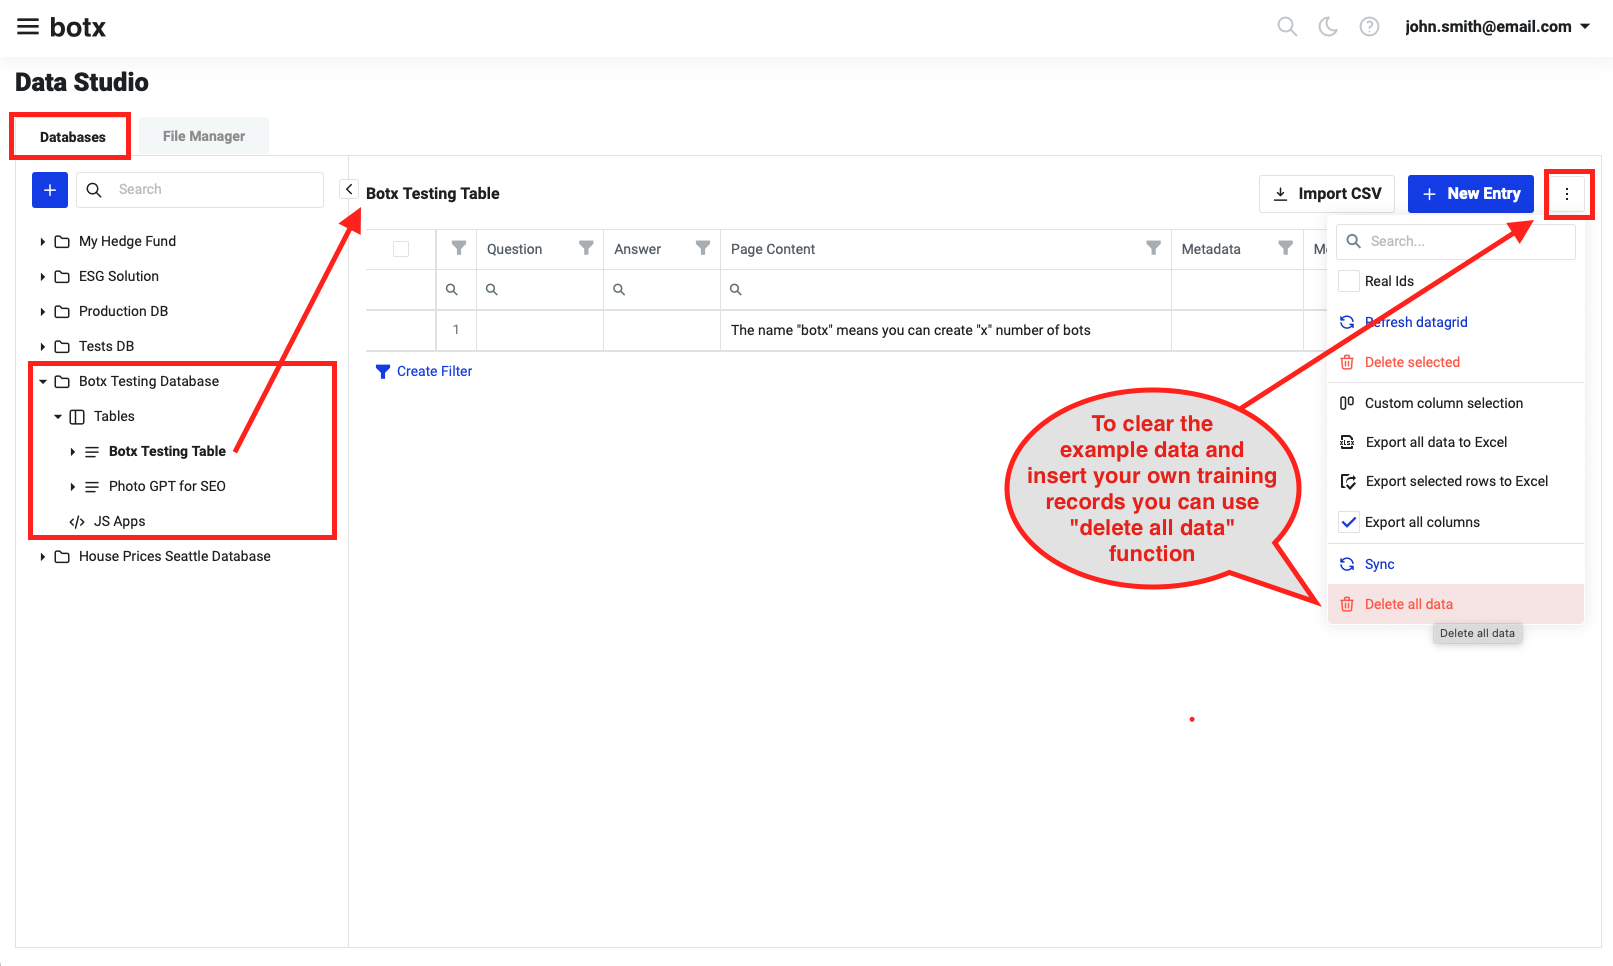
You can have a look at that database. Since this is a template, the database comprises some of our testing data. You can just delete them all by clicking the "Delete all data" button from the menu.
Step 2: Upload Custom Data
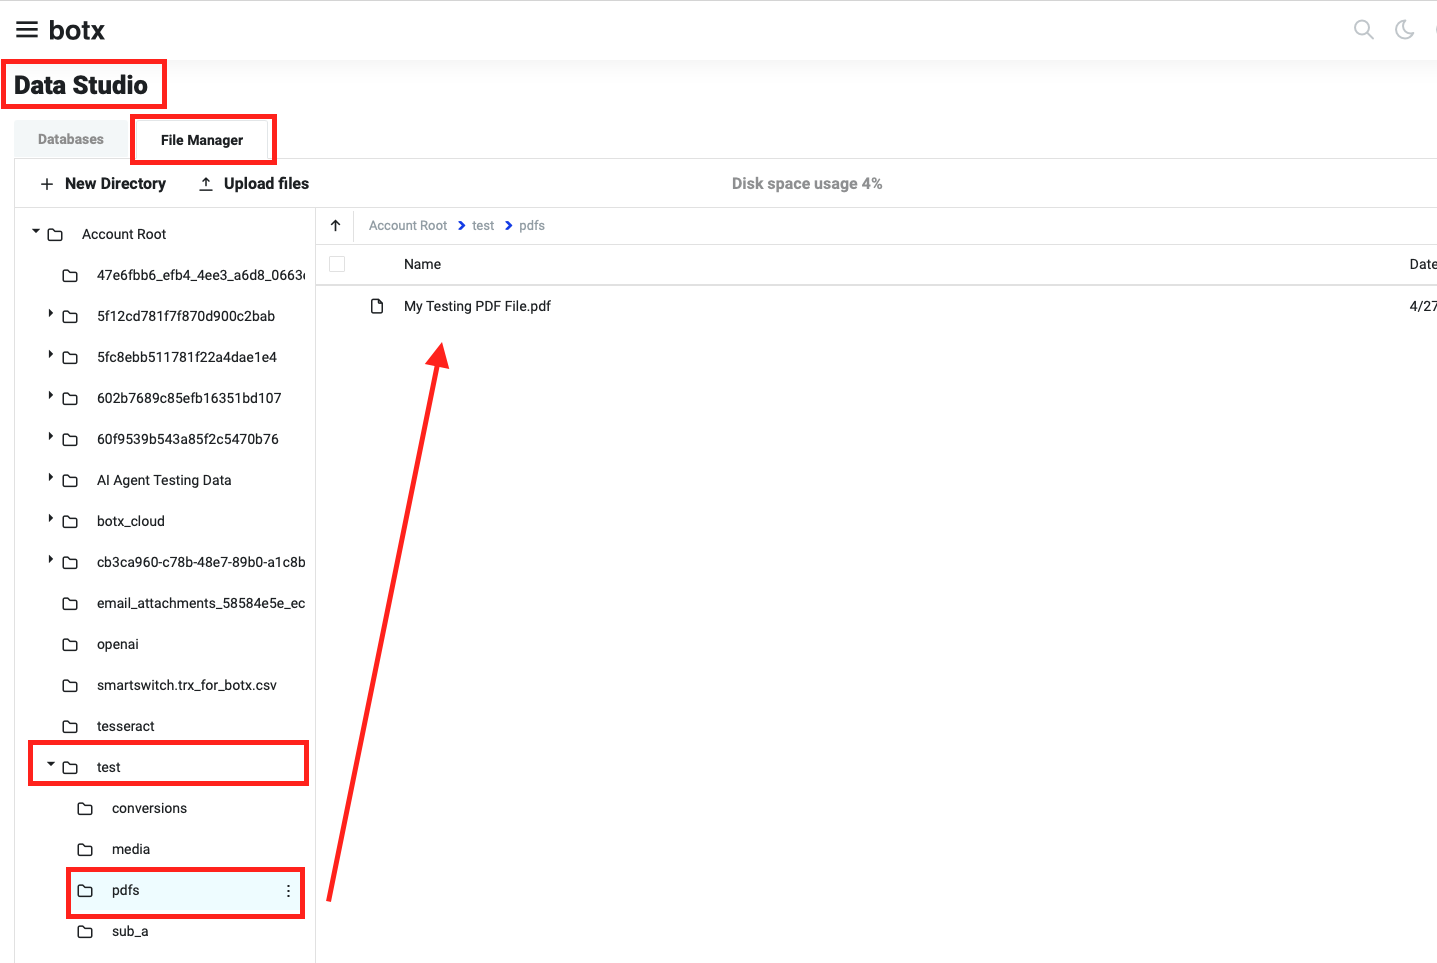
Customers use many different data formats and files, such as PDFs, Word files, PowerPoint presentations, and many others. All such files can be used to train the custom GPT chatbots. I will demonstrate the training process using a simple testing PDF file.
Let's switch to the "File Manager" section of Data Studio. Creating a folder structure for your data before uploading files is good practice. I am going to use my "test -> pdfs" folder. Simply select the folder and click the Upload button. Select your files and wait for the upload to complete.
Step 3: Integrate Data with LangChain
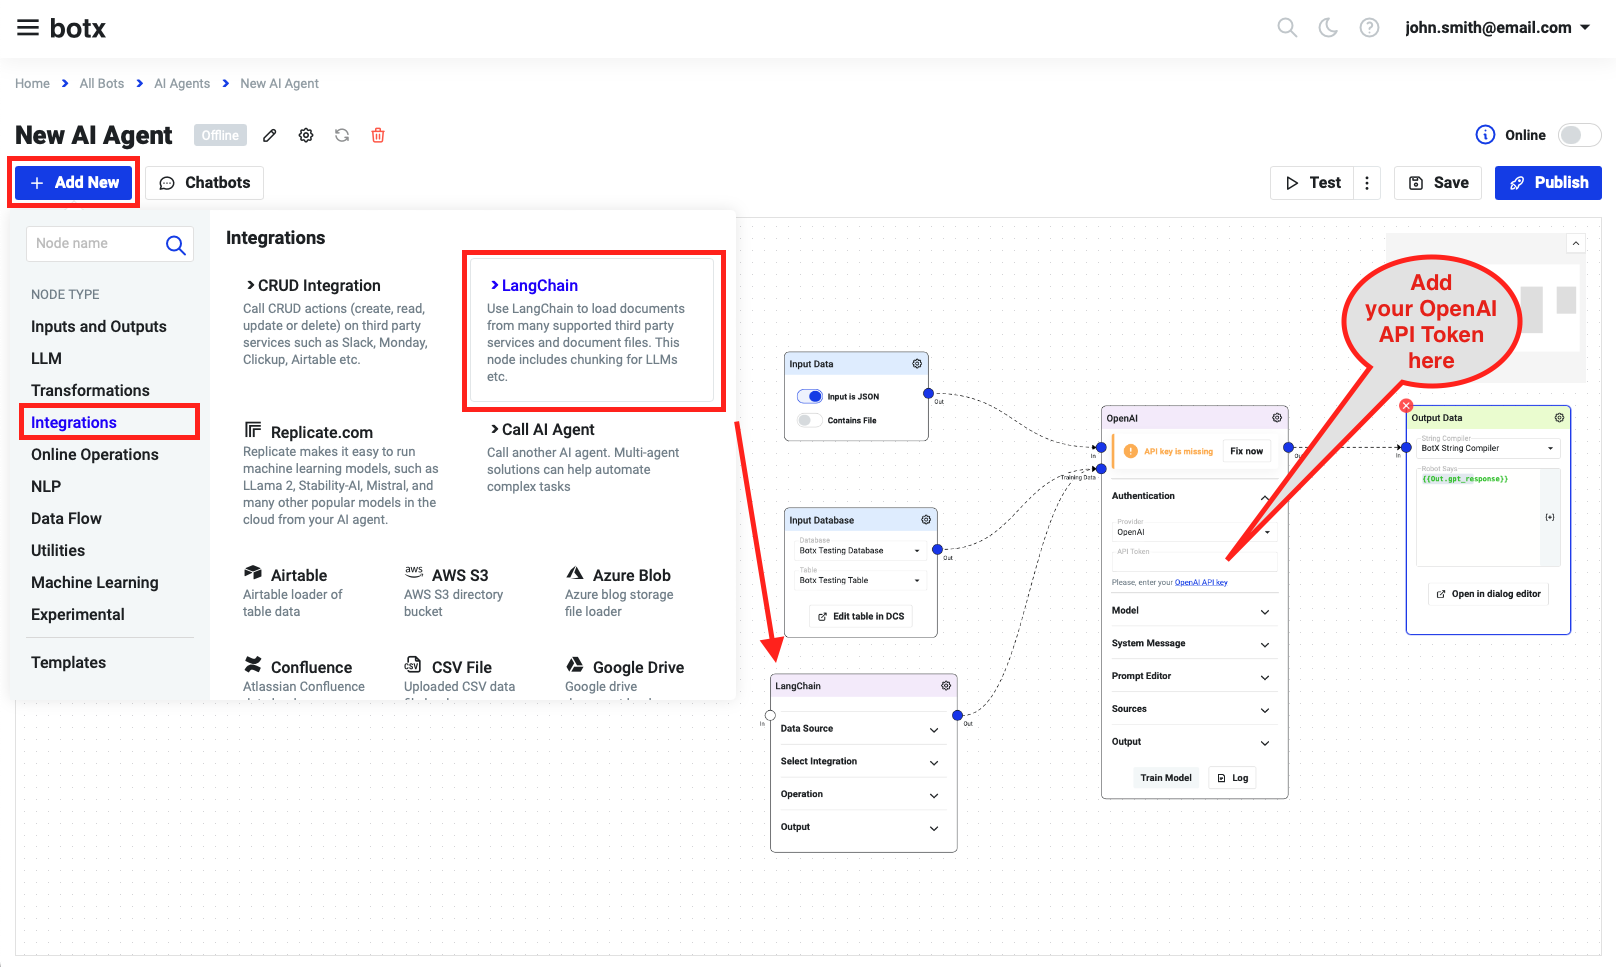
Let's switch back to our new AI agent and create a new LangChain node by clicking the "Add New" button and navigating to the "Integrations" menu. Choose "LangChain". Open the newly added LangChain node settings, and in the "Select Integration" section, choose "PDF Files Loader". Pick the source directory of the folder where you uploaded the files earlier. Customers usually want to list the sources for each ChatGPT answer, so switch on these options.
The BotX platform goes even further than other platforms, allowing you to list chapter names from source PDF files, as well as file names and page numbers. It is useful, especially for larger PDF files. Remember, this feature works better for larger PDF files containing chapters and a more detailed structure.
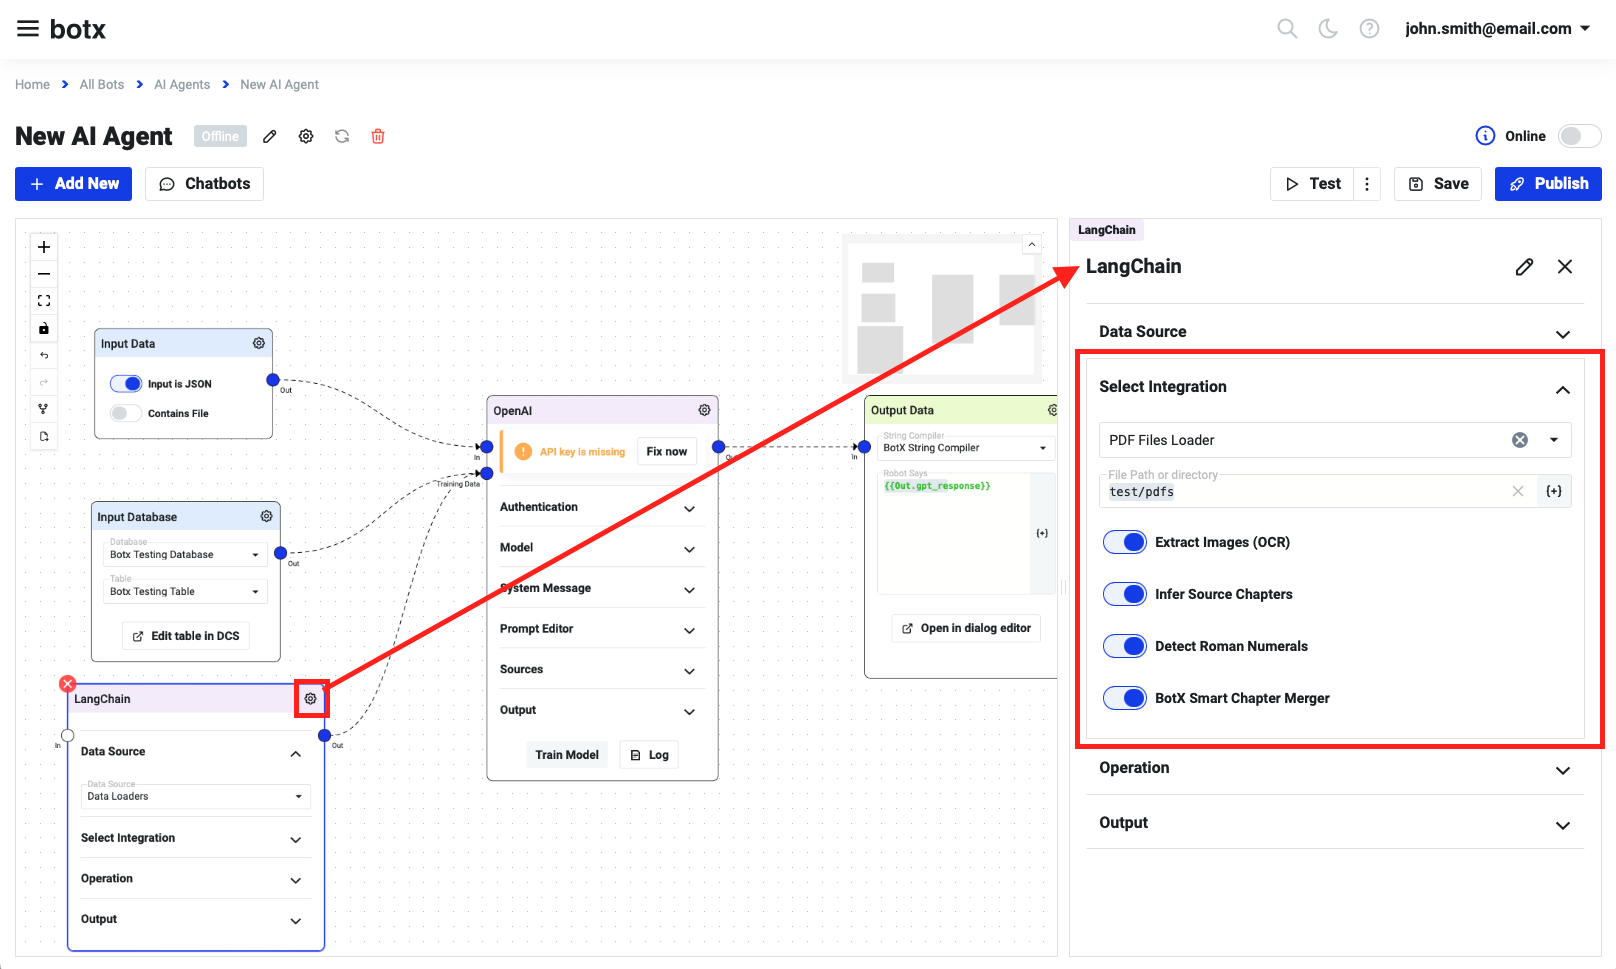
Now, connect the LangChain node to the training data port of your OpenAI node. This action ensures that the ChatGPT model will see all the data from your desired PDF files and your BotX cloud database.
Step 4: Train Your Model
Why is it beneficial to connect a database and LangChain? With the database as the secondary source of training items, you can add whatever data you're missing in PDF files. BotX is open via API, which means you can insert data into the database from outside systems, effectively feeding your custom GPT model with outside data and combining it with your files, such as PDFs. If you need to change anything, you don't need to update PDF files (which is not very convenient). You can use the BotX cloud database and add anything you have missed in the files. Such autonomous learning is what can keep your agent up-to-date.
Let's try it: return to the database, select your table, and add a new entry.
Let's return and finally train the GPT model. First, insert your OpenAI API token. Then, save the agent and switch it to online mode. Wait a bit, then click the OpenAI node's train button.
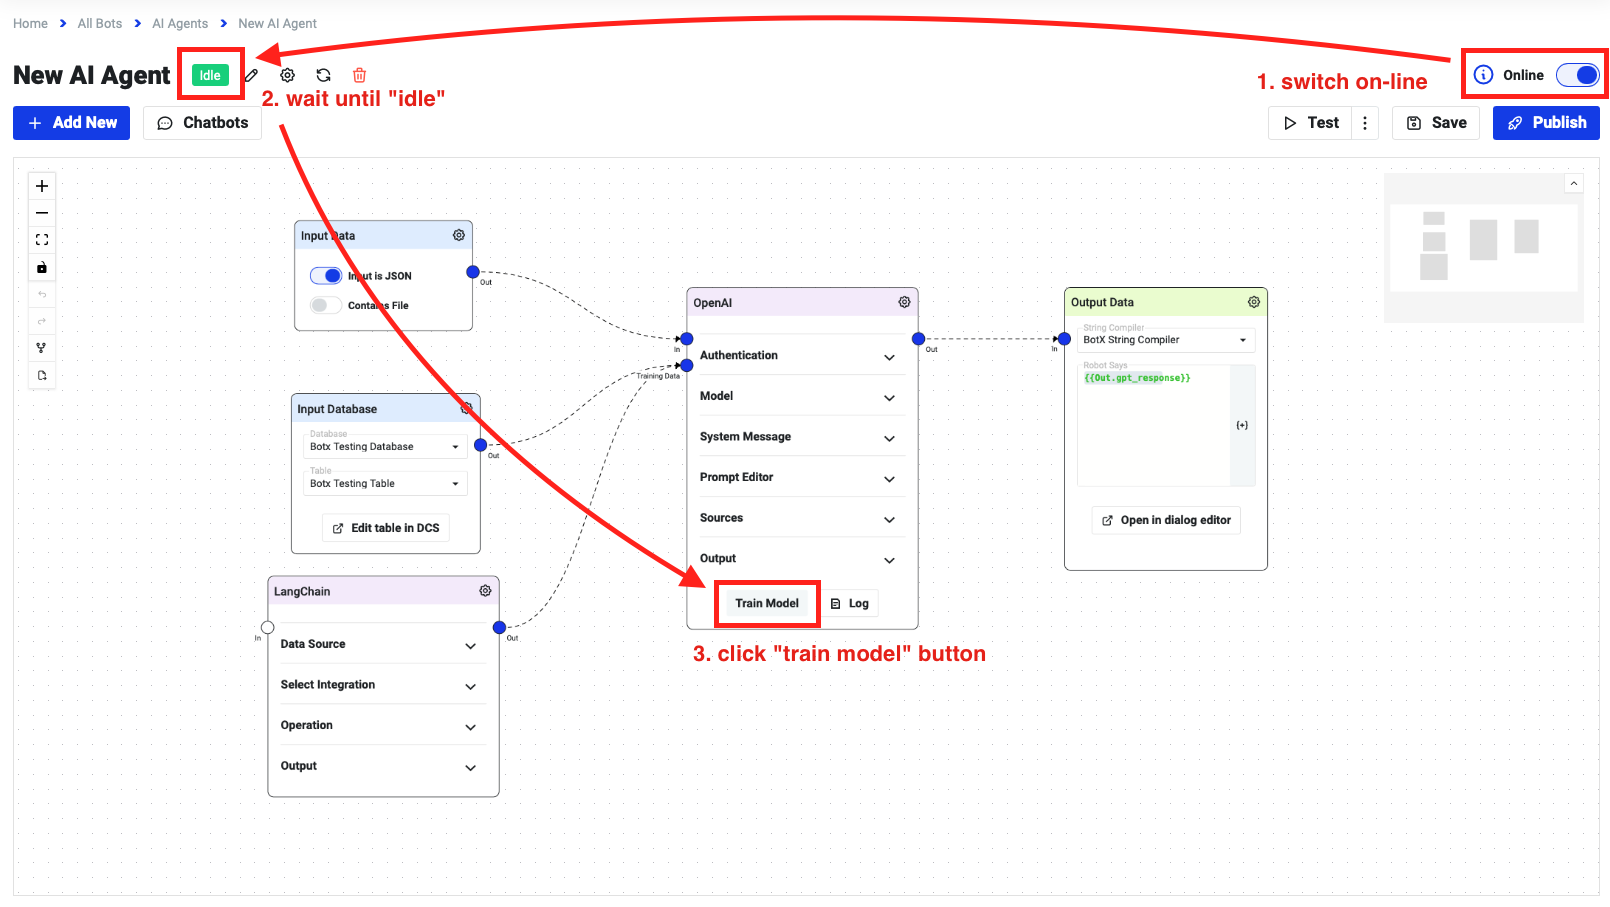
That's it. You have now trained your own GPT model. Test it by clicking the Test button. You can always change the configuration of the testing action from the menu and dialog settings.
Step 5: Create the Chatbot Widget
Let's now create the chatbot widget. Click the "Chatbots" button and select the "Create new chatbot" item.
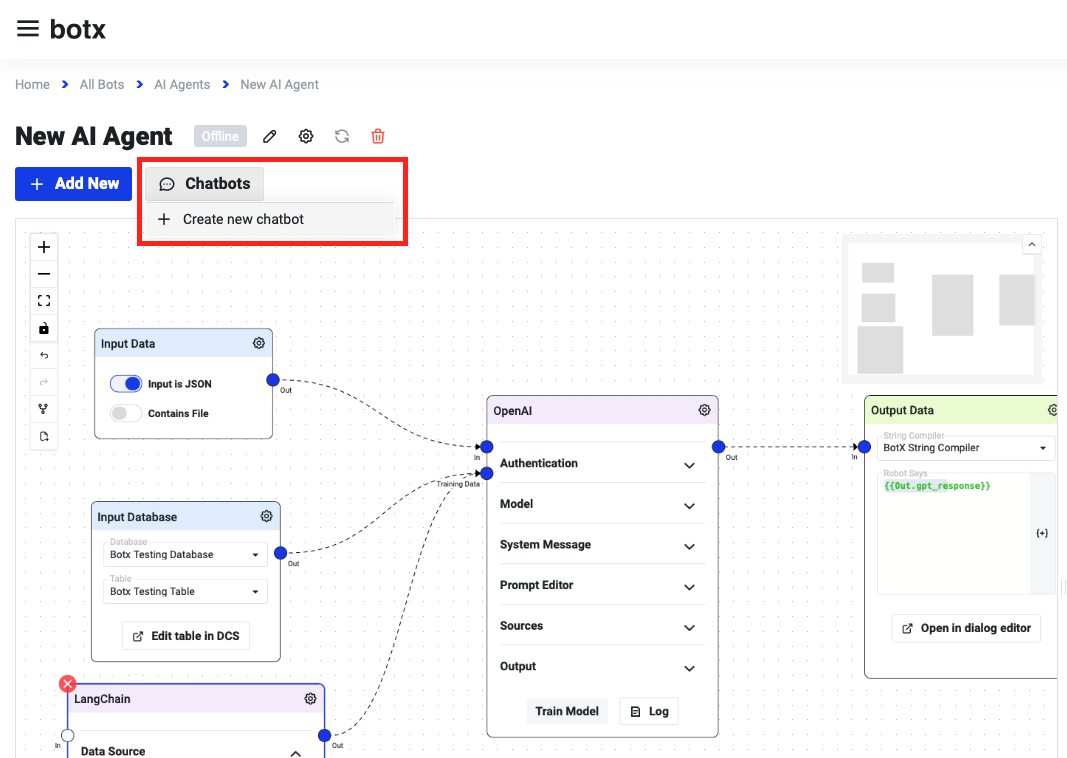
BotX chatbots are all about a graphical user interface for your AI agents. This designer is about creating pre-scripted dialogs, which I will show you later. For now, let's test our GPT using a chatbot widget.
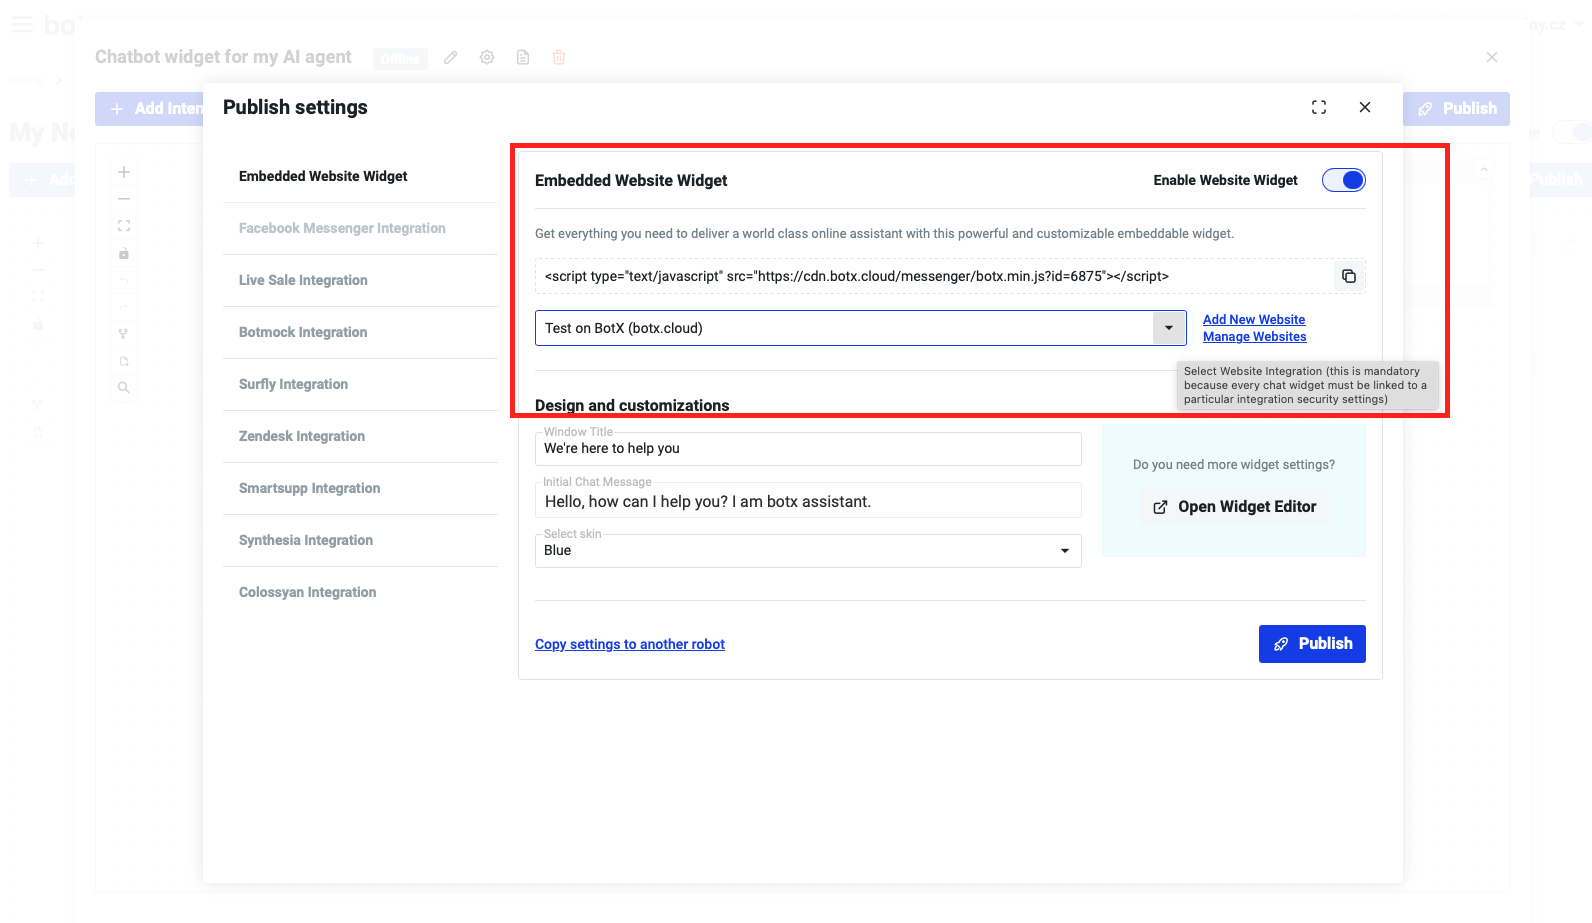
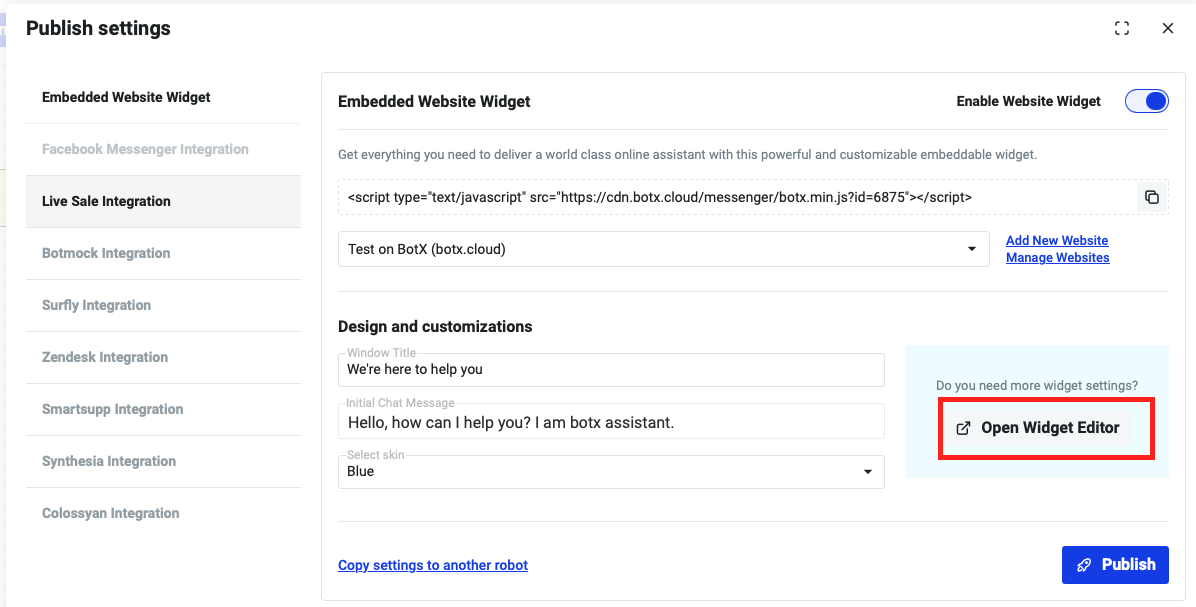
Click the Publish button. First, decide where, meaning on what URL address or website, you would like to place your chatbot. In my case, we have a chatbot on our website, www.botx.cloud, so I will choose the "botx.cloud" domain. Now click the "Open Widget Editor". Here, you can modify any aspect of the chatbot widget, such as design, texts, behavior, etc. Close the dialog and publish the settings.
Great, it's published; now test it. Open the widget and ask a question that can only be answered by knowing what's inside your uploaded training documents. The answer is perfect.
Step 6: Displaying Source Materials
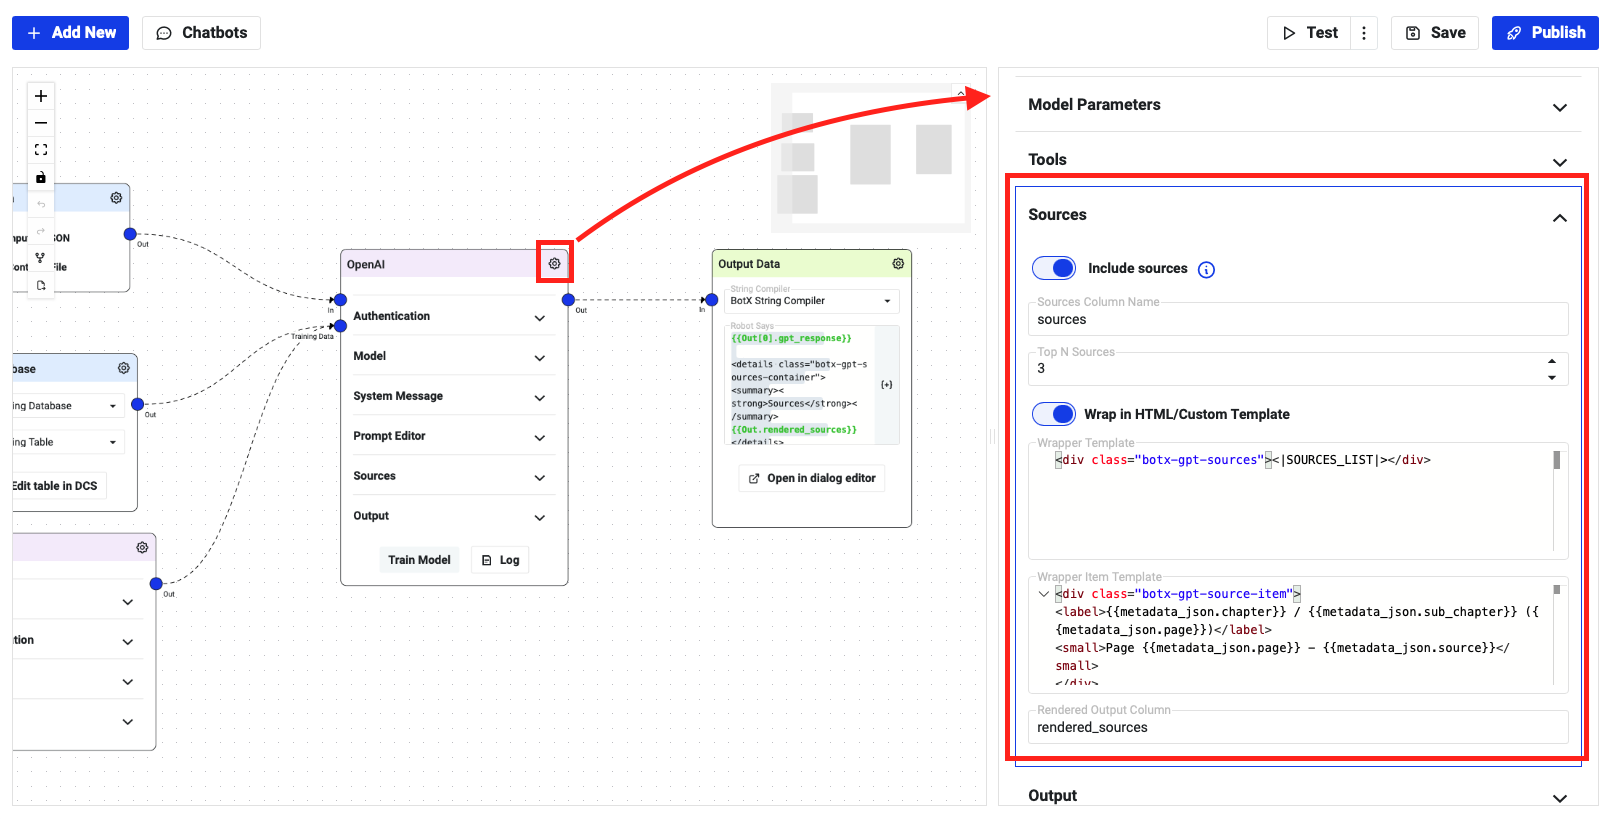
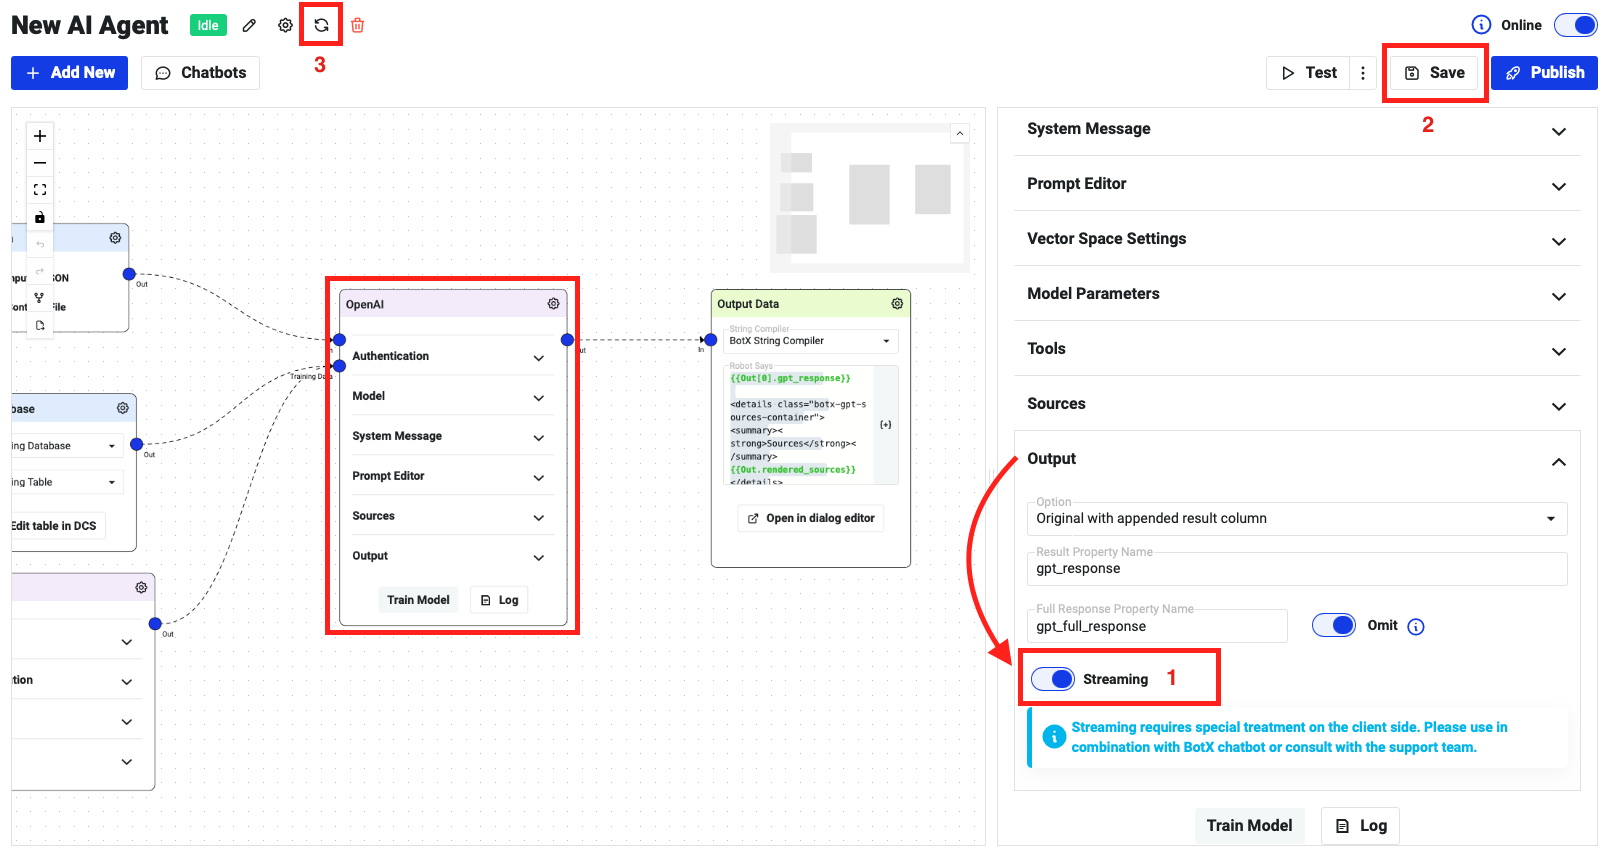
Let's now show you how you can list the sources of answers given by the GPT. Open the OpenAI node's settings and expand the "Sources" panel. Switch on the "Include sources" and the "HTML Wrapper".
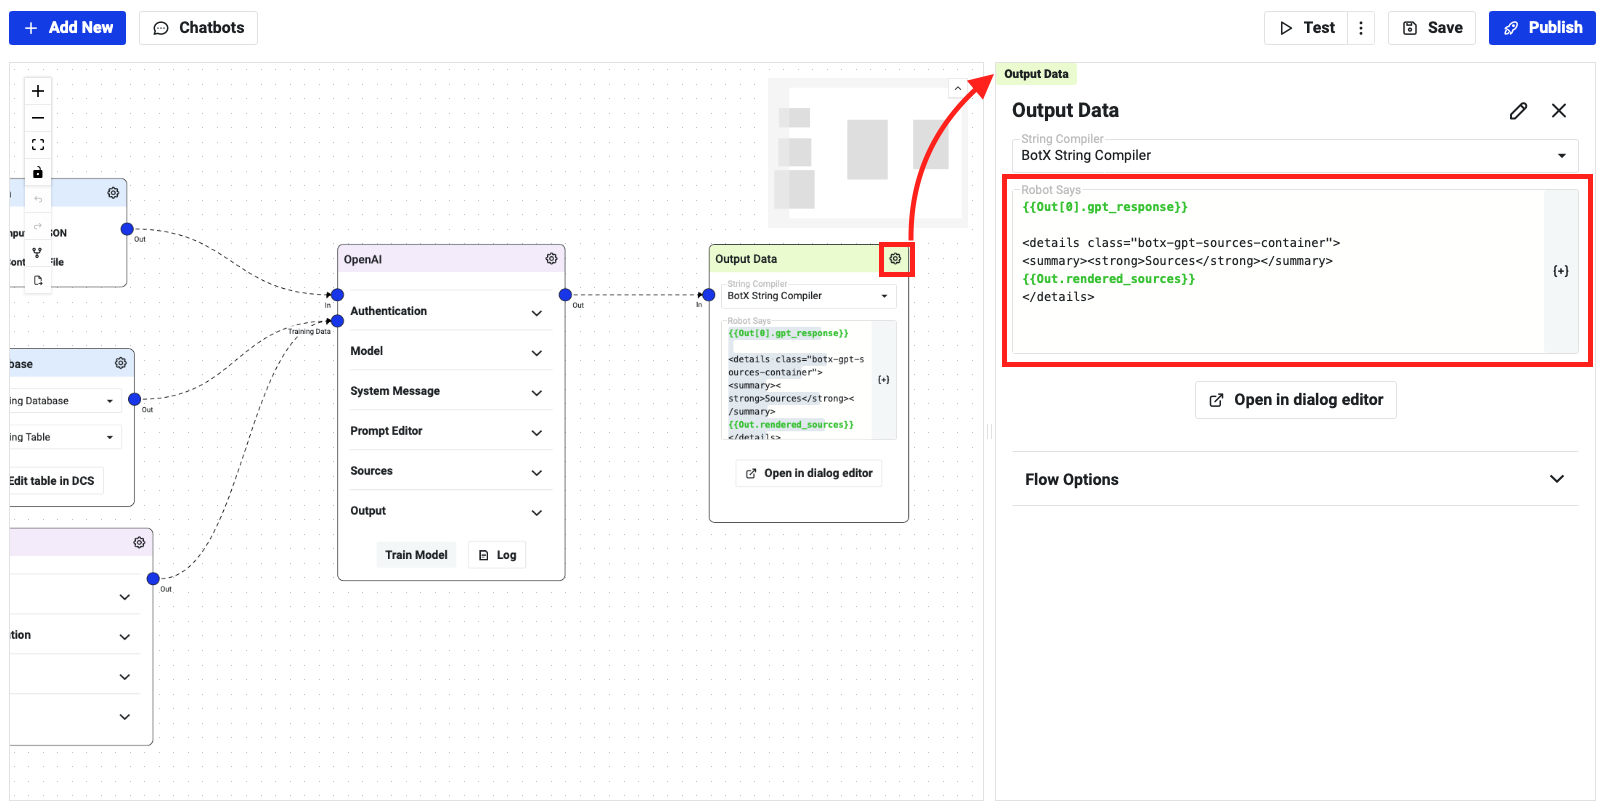
Open the "Output" node's settings and append the source variable to the output.
{{Out[0].gpt_response}}

<details class="botx-gpt-sources-container">
<summary><strong>Sources</strong></summary>
{{Out.rendered_sources}}
</details>
Save the agent and restart it. This will take a second.

Let's open the chatbot again and test it on the same question.
As you can see, it now lists the source materials. BotX stands out by understanding which PDF chapters are involved, as seen in my testing PDF document. You can also improve the source list by wrapping it in more appropriate HTML tags. Let's save and restart the agent again to see the result. Open the widget and type our question. That already looks much better.
Step 7: Customizing and Streaming
In BotX, you can always change any design aspect in our CSS editor. You can also change the logic and implement complex behavior in our JavaScript editor. Finally, you can insert your chatbot widget into your website by copy-pasting the following script into your site's HTML or GTM, Webflow, Wix, or similar.
Another helpful feature that I want to show you, mainly if you use larger AI models that are slower, is the streaming. Open the OpenAI's node settings, go to the "Output" panel, and switch on the streaming. Save and restart the agent and see the streaming in action. As you can see, the answer is being streamed in real-time.
Step 8: Continuous Training and Testing
As mentioned, the benefit of having data sources in a database besides your document files is much easier continuous training. Let's test our agent on the data we inserted into the database. Type our question. As you can see, this fragment of knowledge is learned from the database.
Step 9: Adding Custom Action Buttons
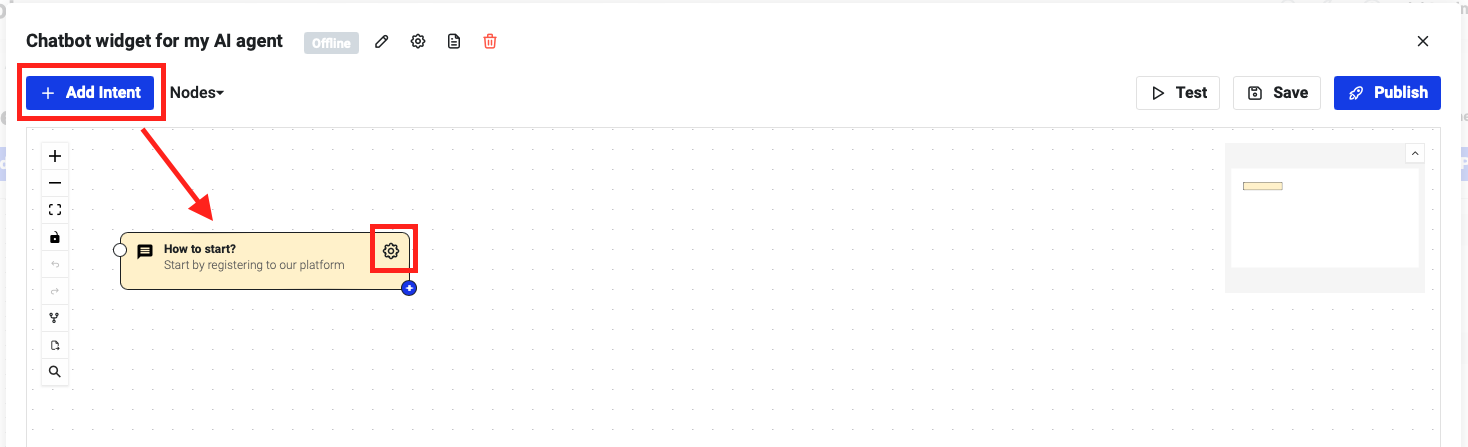
Lastly, let's show you how to add custom action buttons to your widget. Open the chatbot and click the "Add Intent" button. Open the settings of the intent and enter any details you wish. The editor is HTML-based so that you can enter almost anything.
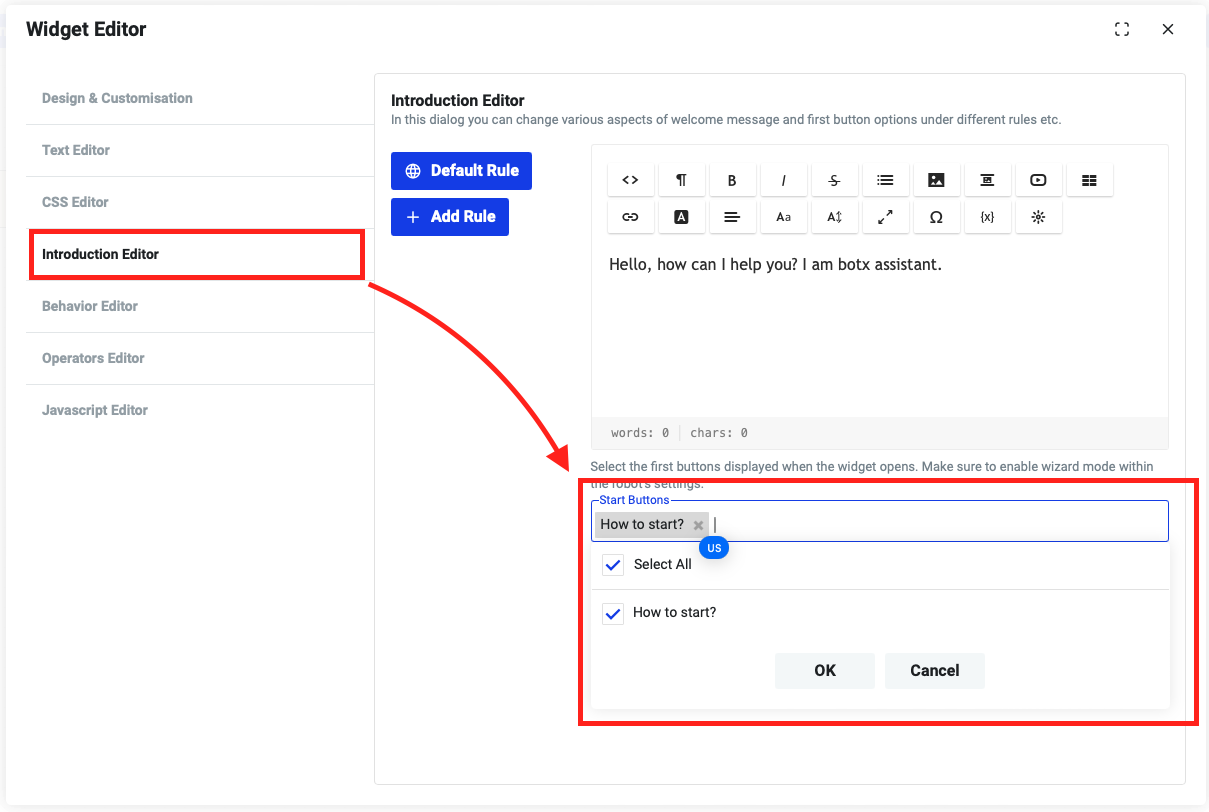
Save the settings, save the chatbot, and open the "Widget Editor" in the publish dialog.
In the "Introduction Editor", select your intent. Publish the settings and test our chatbot.
As you can see, you have added a nice action button. You can build the whole tree of pre-scripted questions/answers here, and in combination with the custom-trained ChatGPT, you can make a truly unique and powerful assistant.
Full Video Tutorial on YouTube
You can also watch the entire video tutorial on our YouTube channel:
Thank you for watching, and don't hesitate to contact us. We will see you soon in our next tutorial.