Chatbot Publishing Guide
Welcome to the BotX Platform Chatbot Publishing Guide. This documentation provides a comprehensive, step-by-step process to publish and deploy chatbots on the BotX platform. Whether you are an experienced developer or new to our platform, this guide will help you seamlessly integrate chatbots into your website.
Our platform offers a powerful and customizable chatbot solution, designed to enhance user interactions and streamline communication. By following this guide, you can quickly set up, configure, and deploy chatbots tailored to your specific needs, ensuring a smooth and efficient user experience.
This document will walk you through the essential steps, from accessing the chatbot publishing dialog to specifying the deployment domain and customizing the chatbot's design. Let's get started and unlock the full potential of your chatbot with BotX!
Step 1: Open the Chatbot's Publishing Dialog
There are two ways to open the chatbot's publishing dialog:
Method 1: From the AI Agent
-
Navigate to the AI Agent and click the
Publishbutton.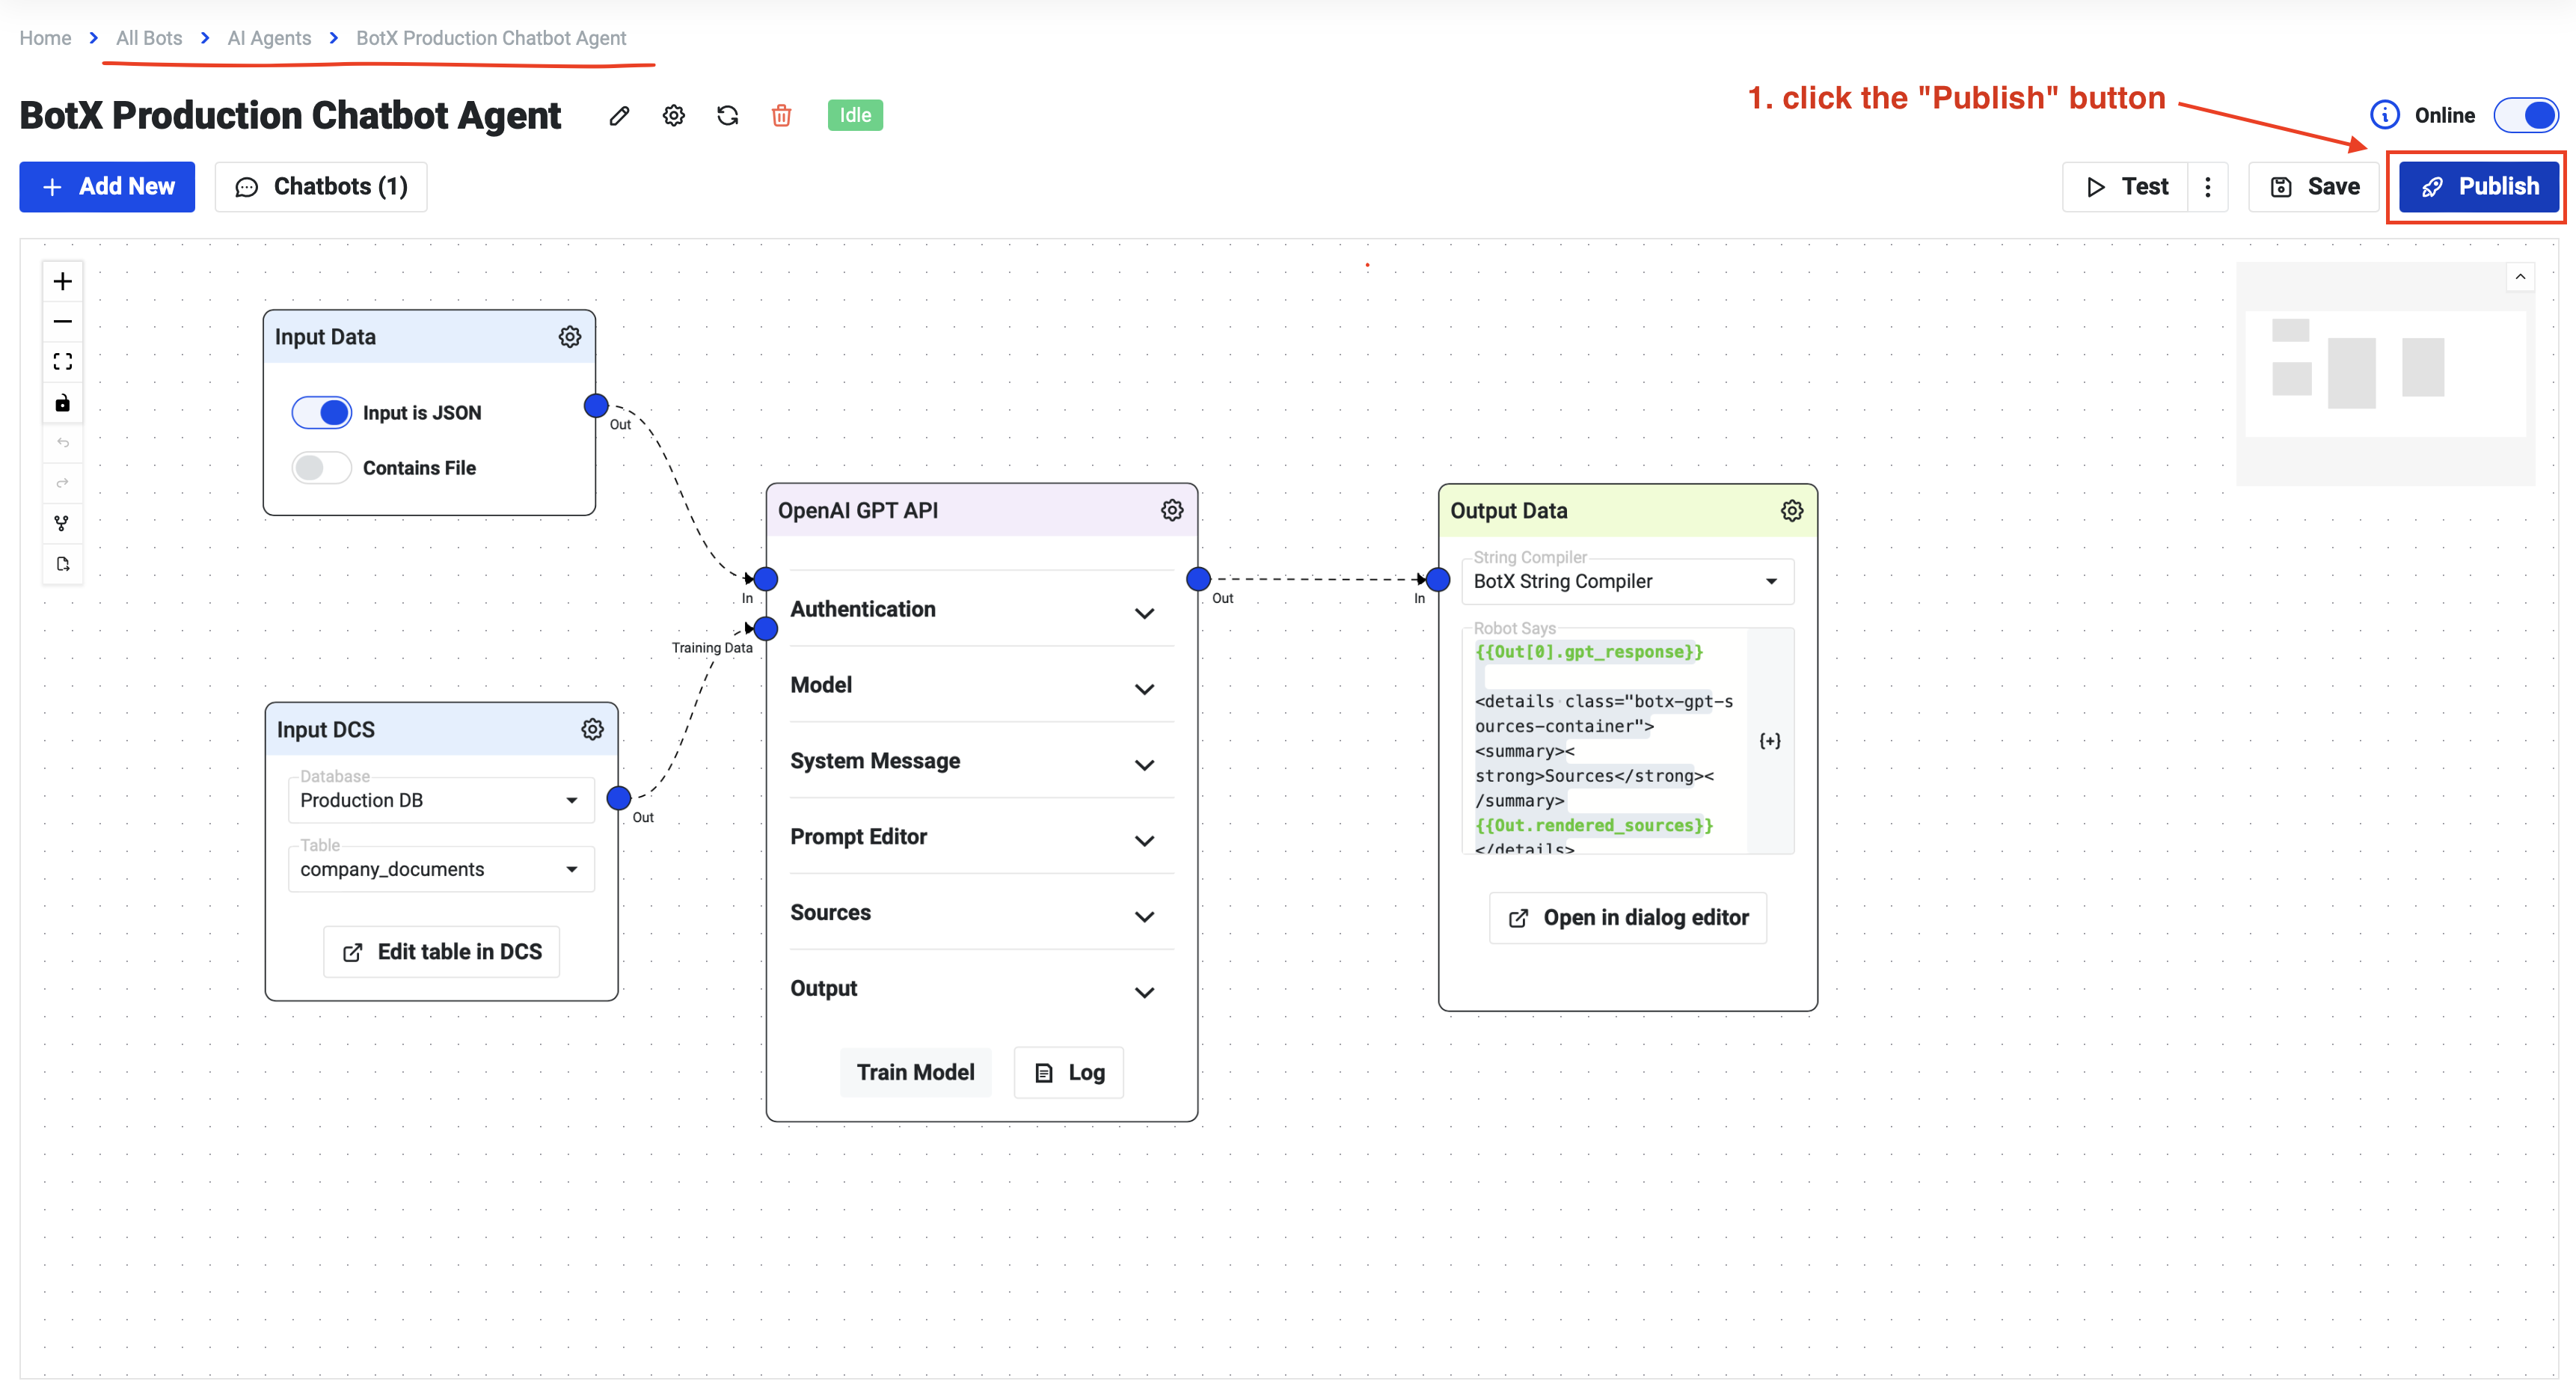
-
In the publishing dialog, navigate to the
Website integrationtab.
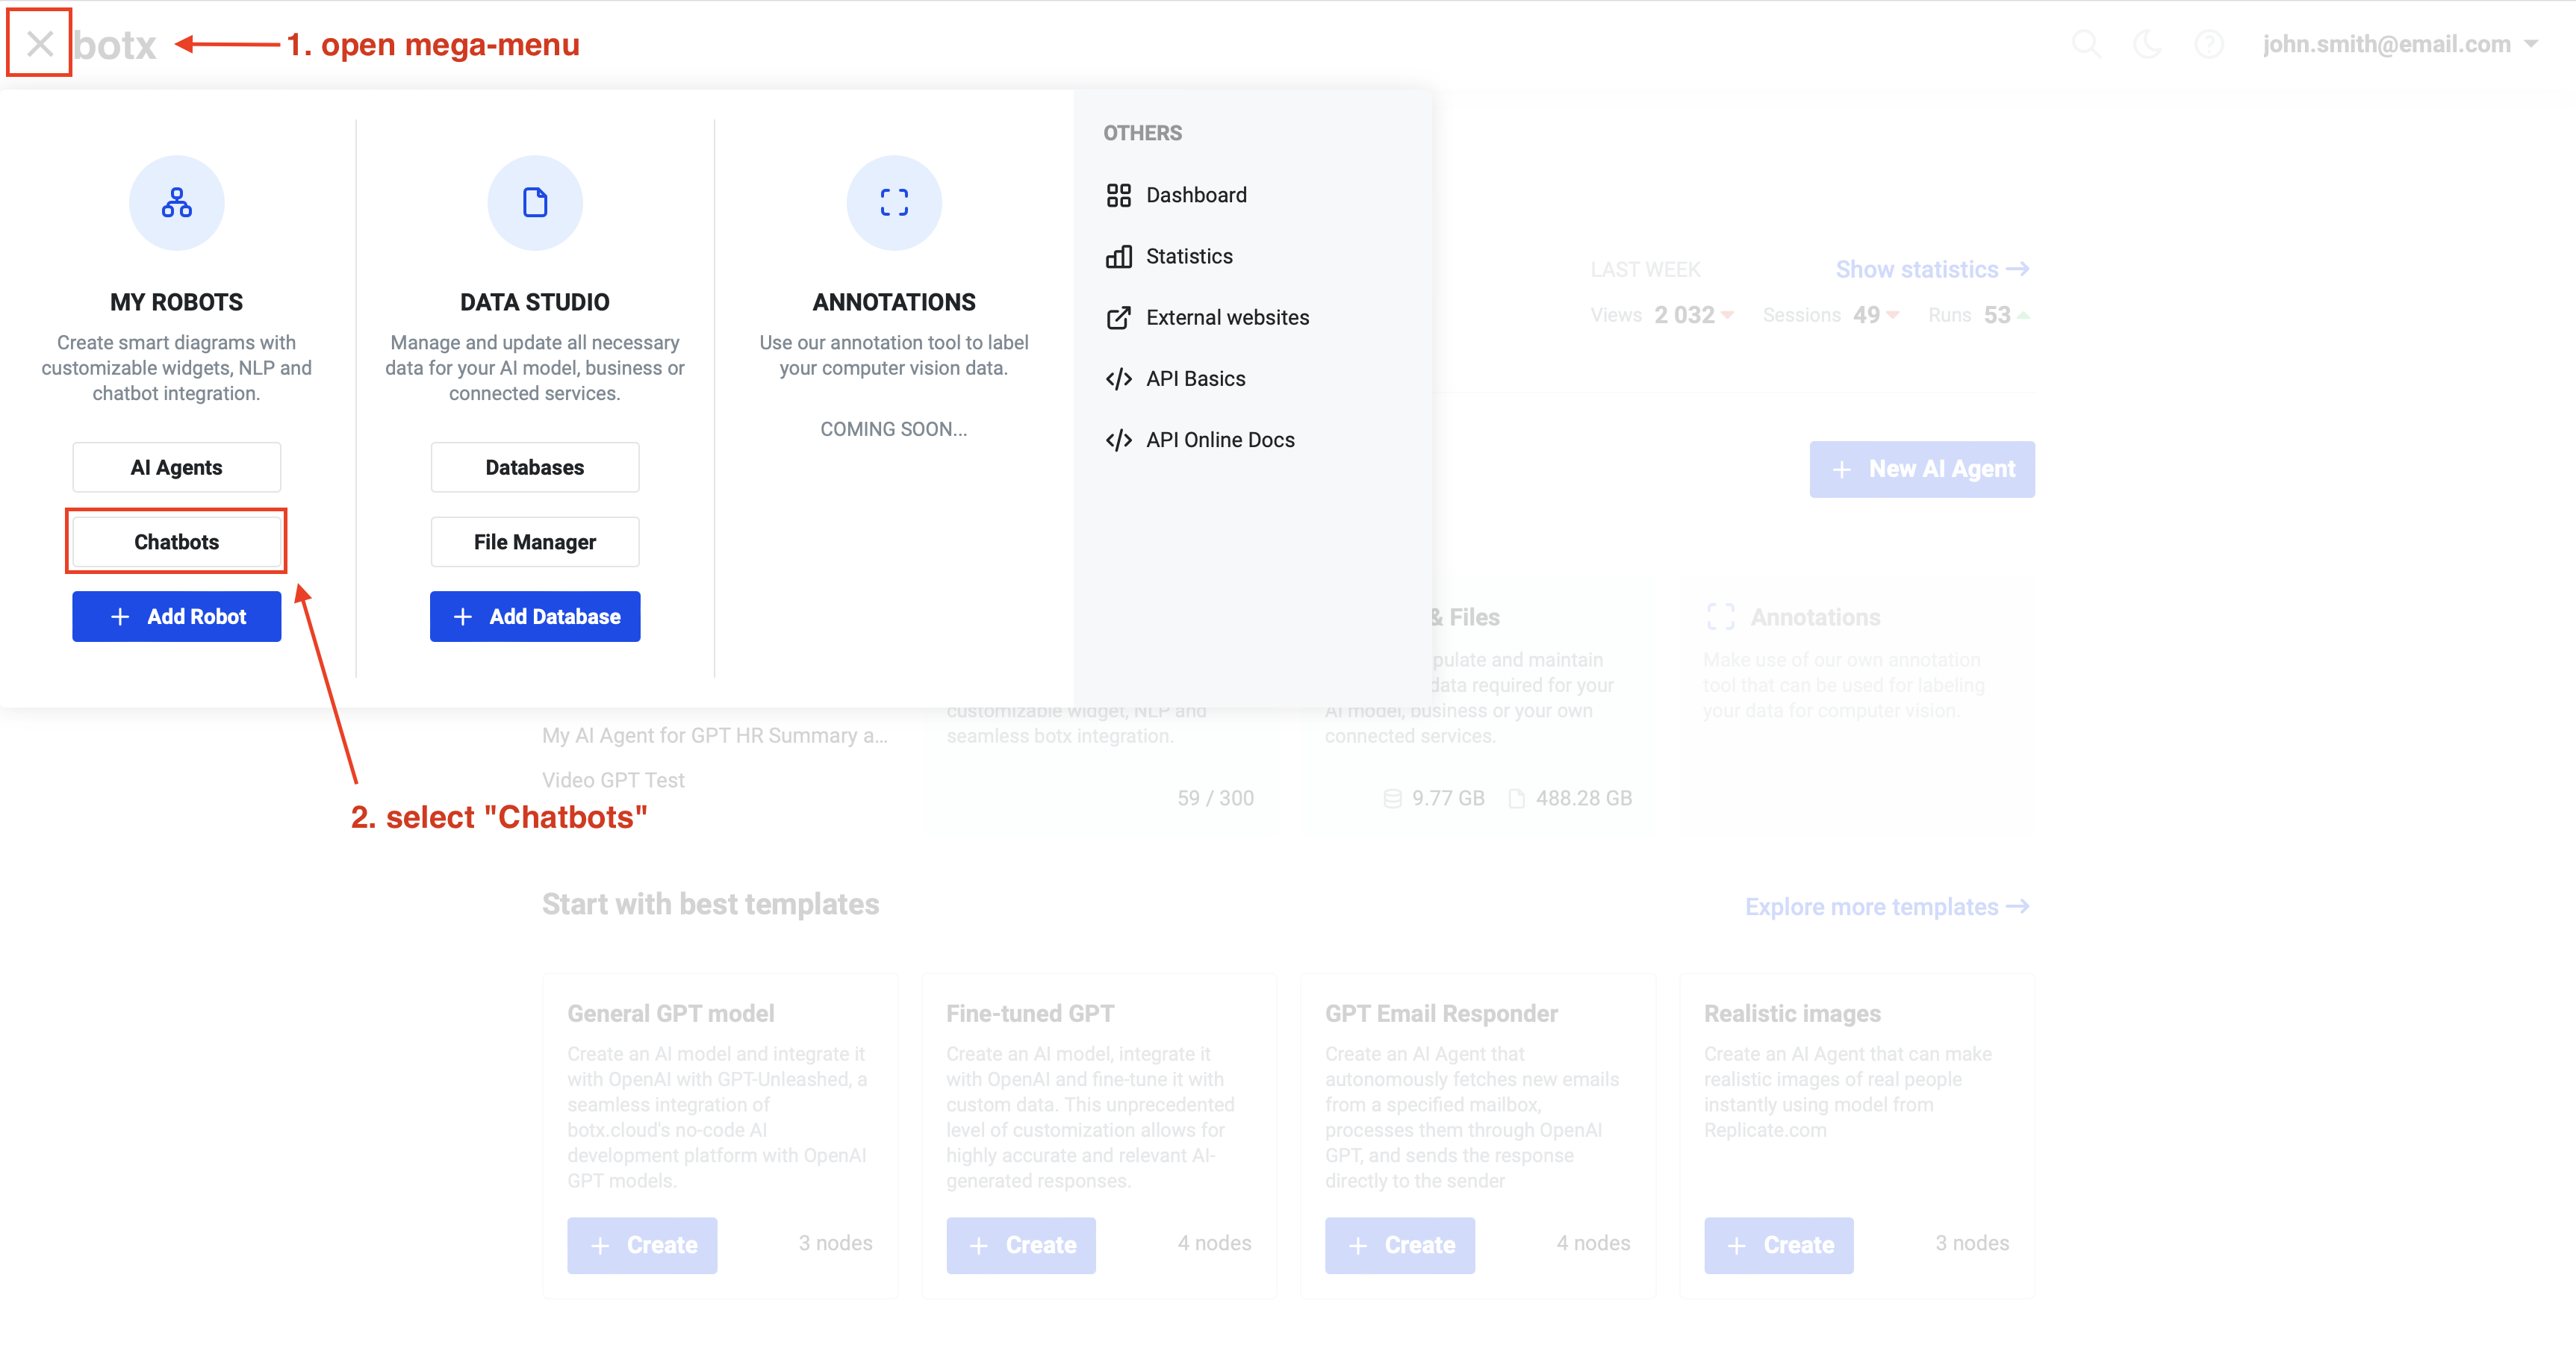
Method 2: From the Main App's Mega Menu
-
Open the mega-menu by clicking on the menu icon.
-
Select
Chatbotsunder theMY ROBOTSsection. -
Click on the desired chatbot from the list.
-
Click the
Publishbutton on the chatbot's page.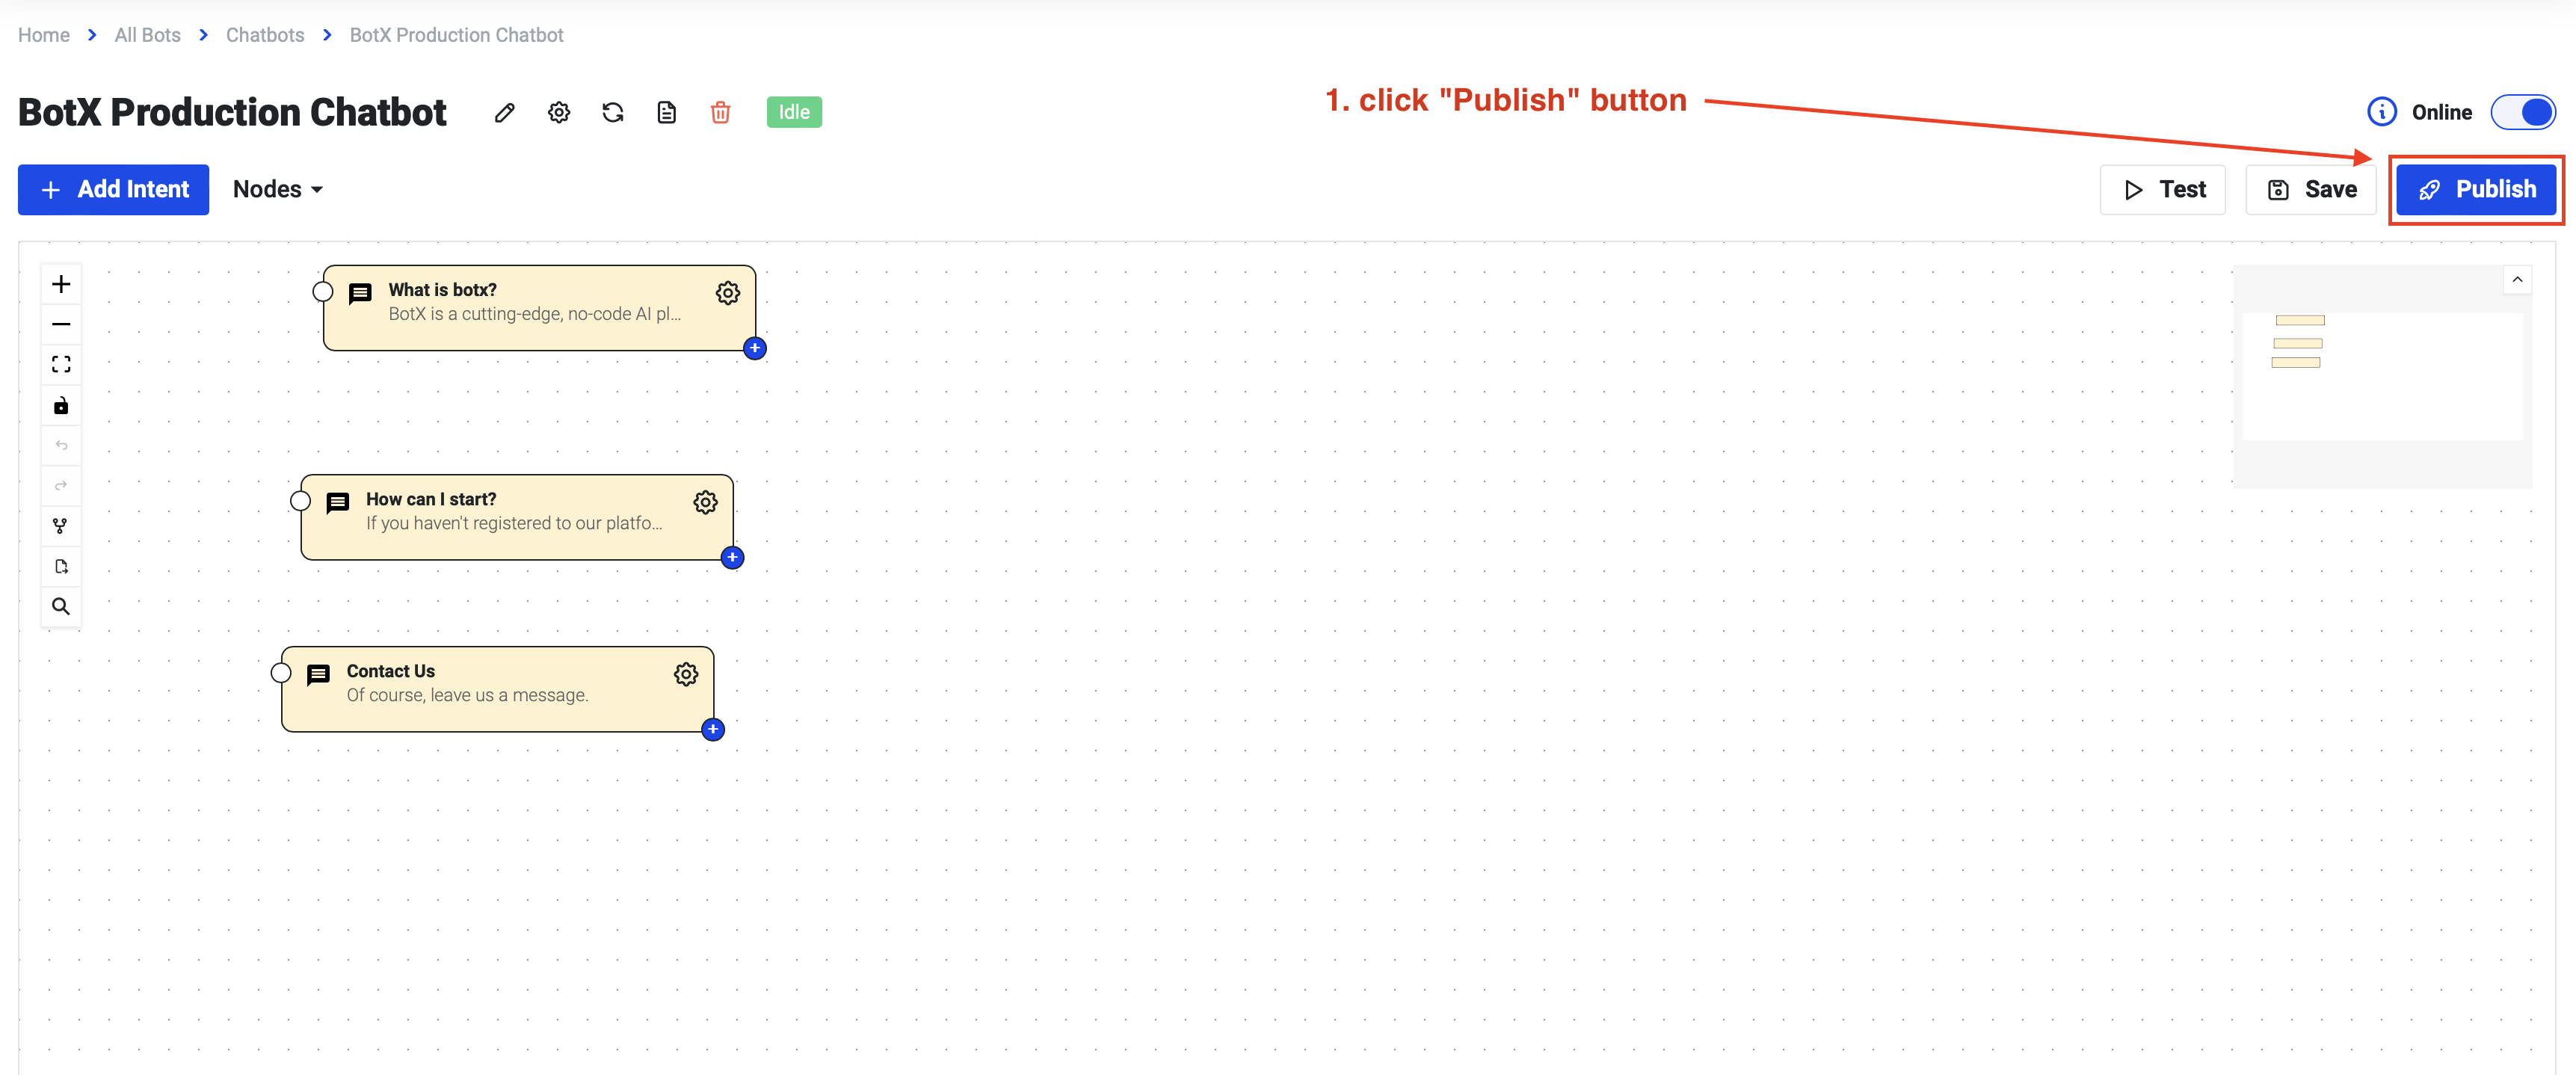
Step 2: Enable Website Widget
- In the publishing settings, make sure the
Enable Website Widgettoggle is switched on.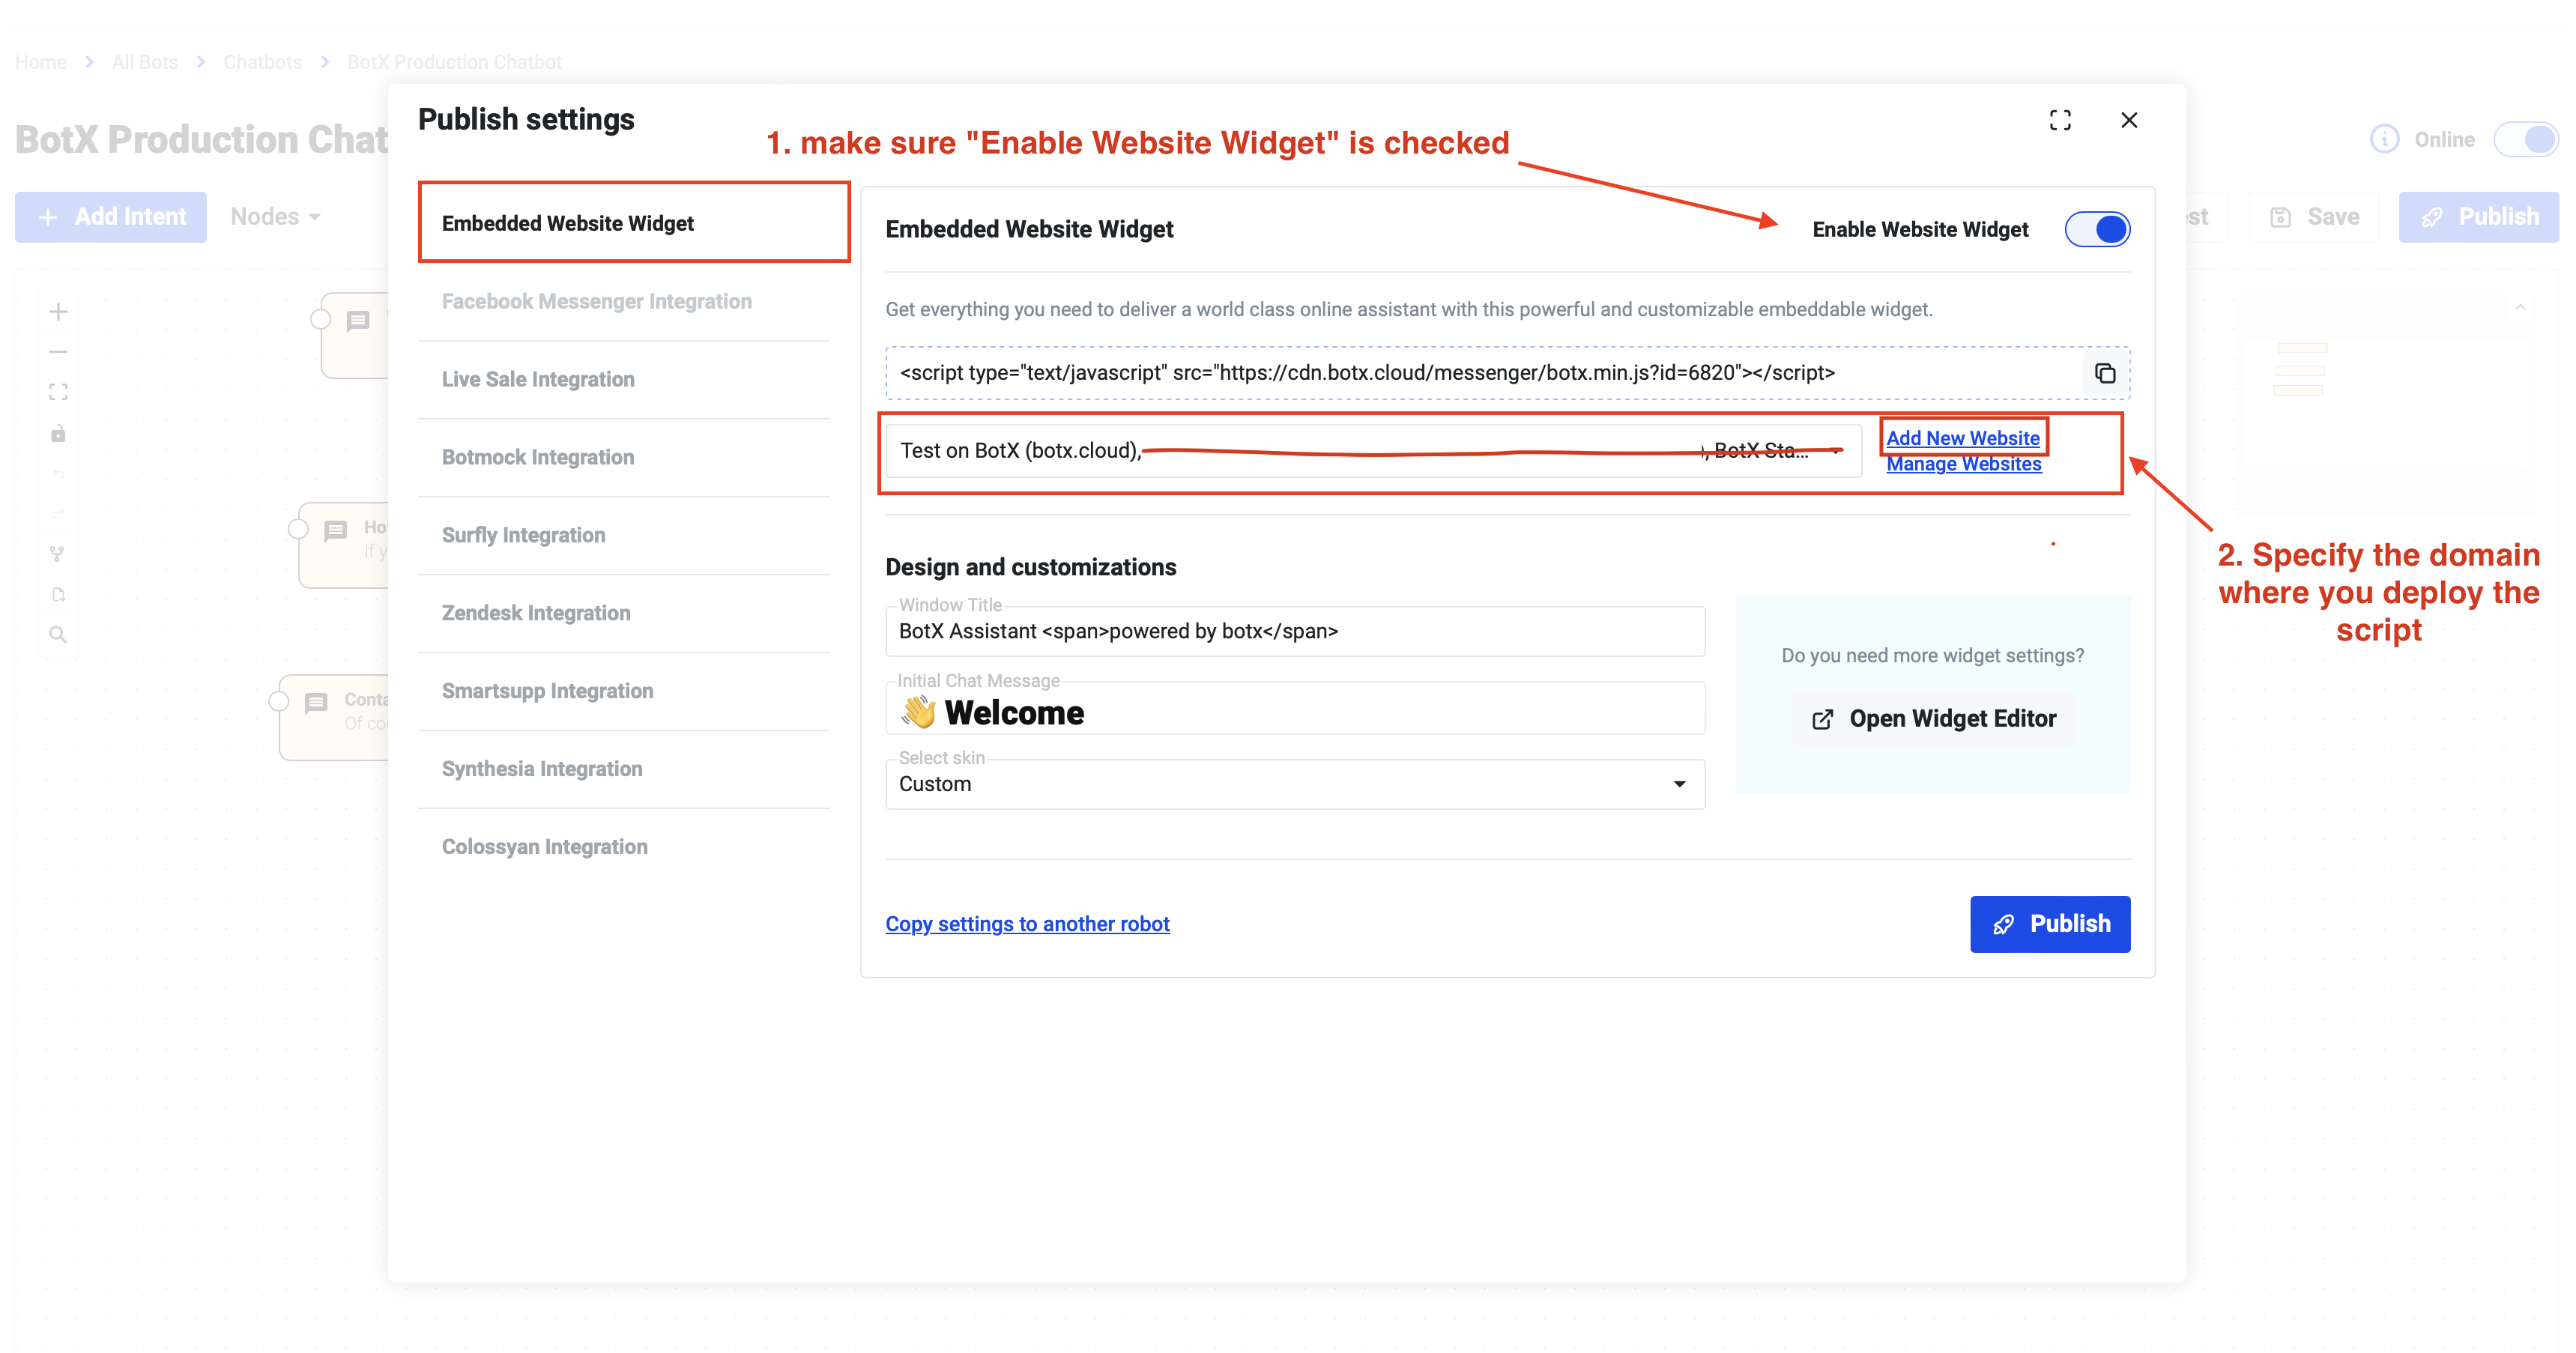
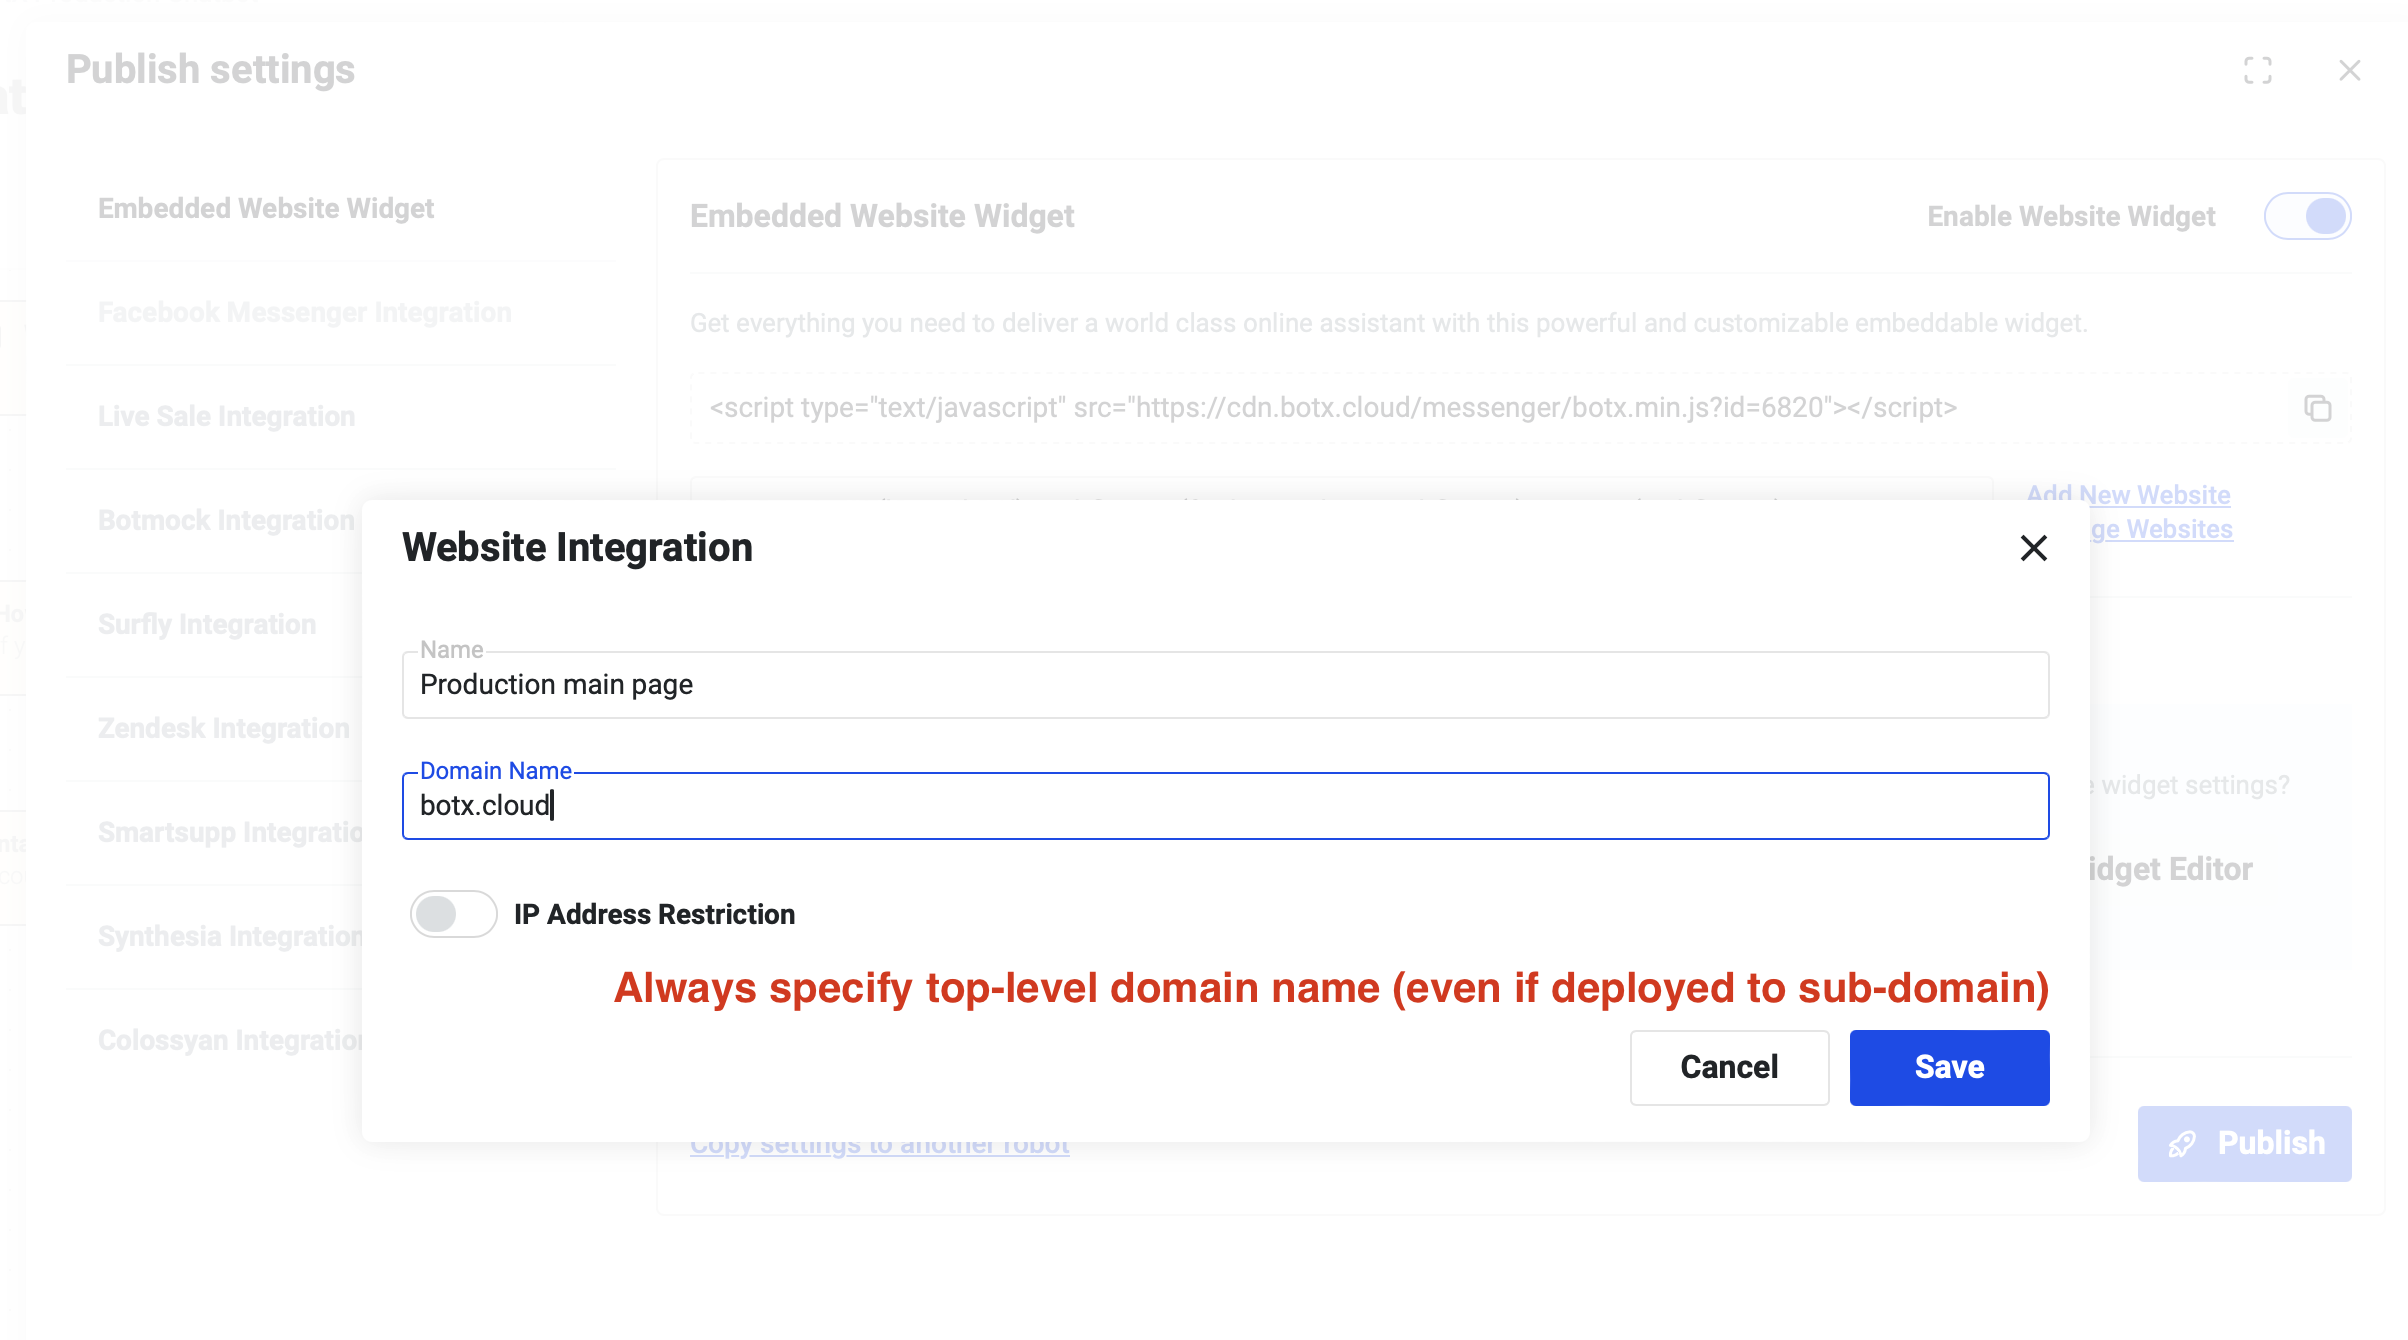
Step 3: Specify the Domain
- Decide which domain the chatbot will be deployed on.
- In the
Website Integrationsection, specify the top-level domain name. For example, if you want to insert the chatbot script towww.botx.cloudorhttps://subdomain.botx.cloud, you must insert the domain name asbotx.cloud. - This step is essential because BotX will block chatbots embedded into websites whose domains are not specified as enabled domain names.
Step 4: Adjust Widget Design and User Experience Settings
- Customize the design and user experience settings according to your preferences.
- Adjust settings such as the window title, initial chat message, and skin.
Step 5: Publish the Chatbot
- Once all settings are configured, click the
Publishbutton to deploy the chatbot.
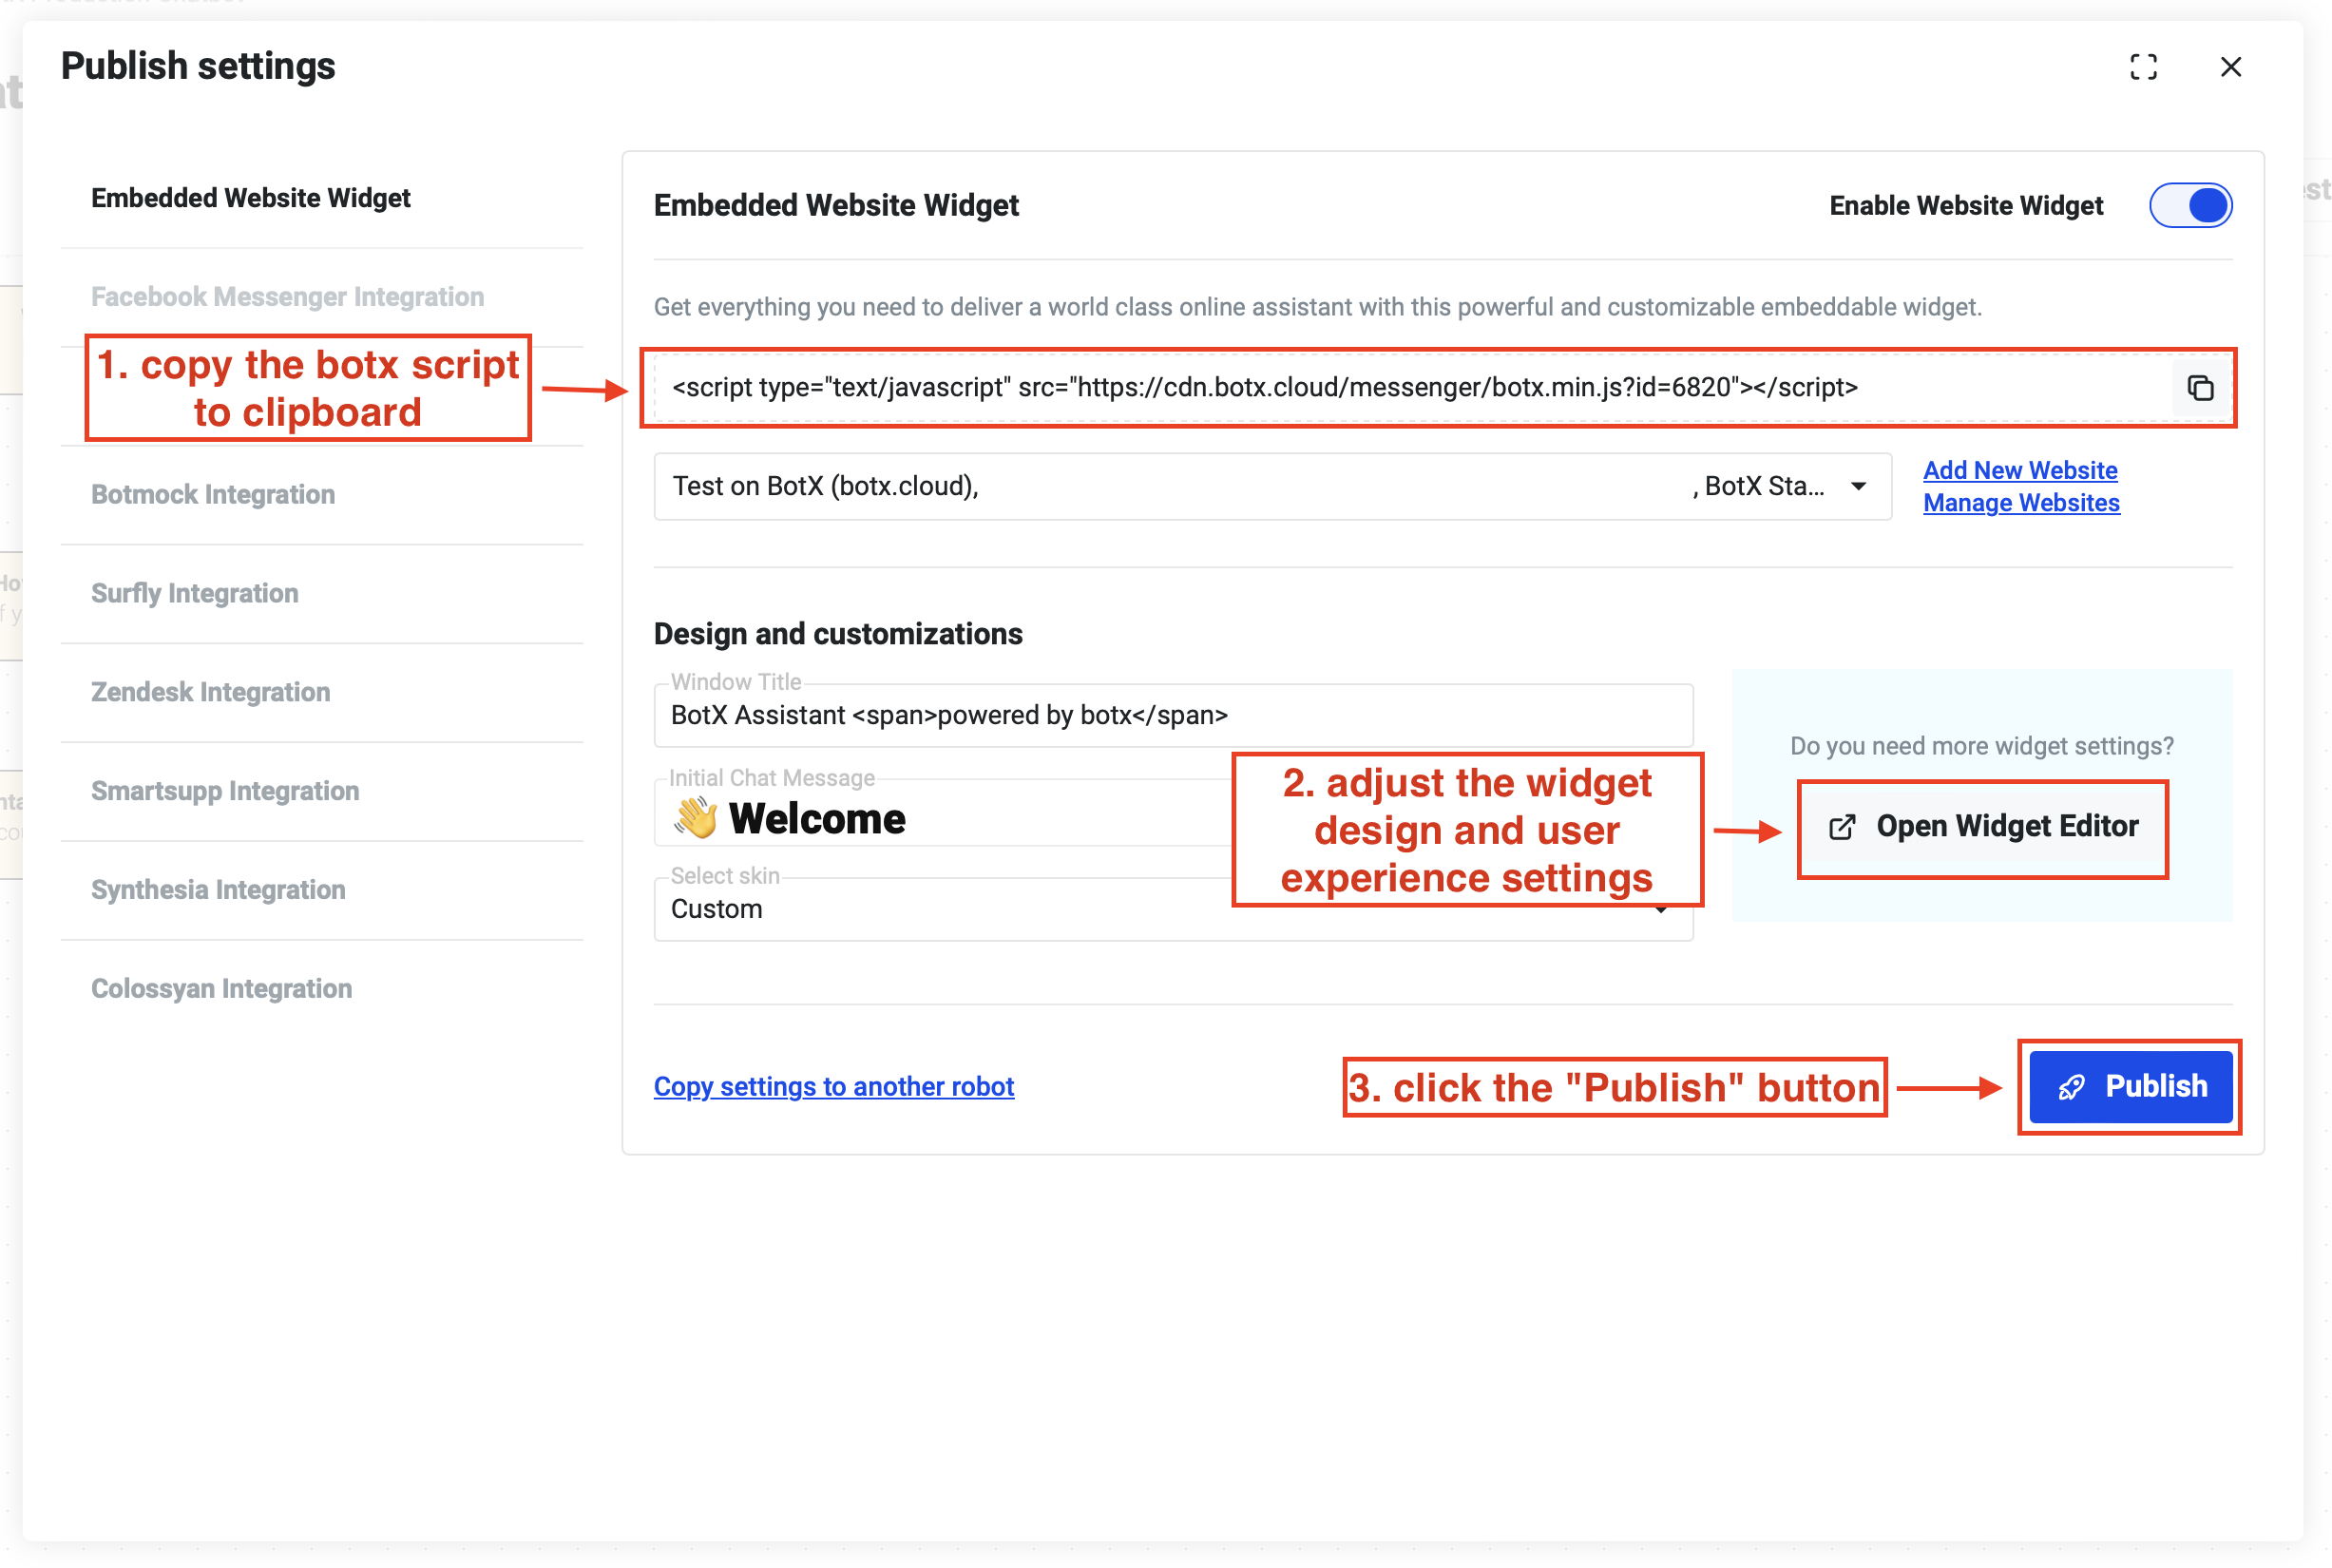
Step 6: Integrate the Chatbot Script into Your Website
After publishing your chatbot, you need to include the generated script into your website's HTML. This is a crucial step to ensure your chatbot is active and operational on your site.
- In the
Embedded Website Widgetsection of the publishing settings, locate the field containing the script link. - Click the
copybutton next to the script link field to copy the script to your clipboard. - Paste the copied script into your website's HTML. You can insert it either within the
<head>tag or at the end of the<body>tag, depending on your preference and website structure.
By following these steps, your chatbot will be embedded into your website, ready to interact with your users and provide a seamless communication experience.
And that's it! Your chatbot should now be published and integrated into your specified website domain.